Bodies Presets
With bodies presets, you can save a set of body selections and apply them to other studies. This is useful when you frequently work with the same group of celestial bodies.
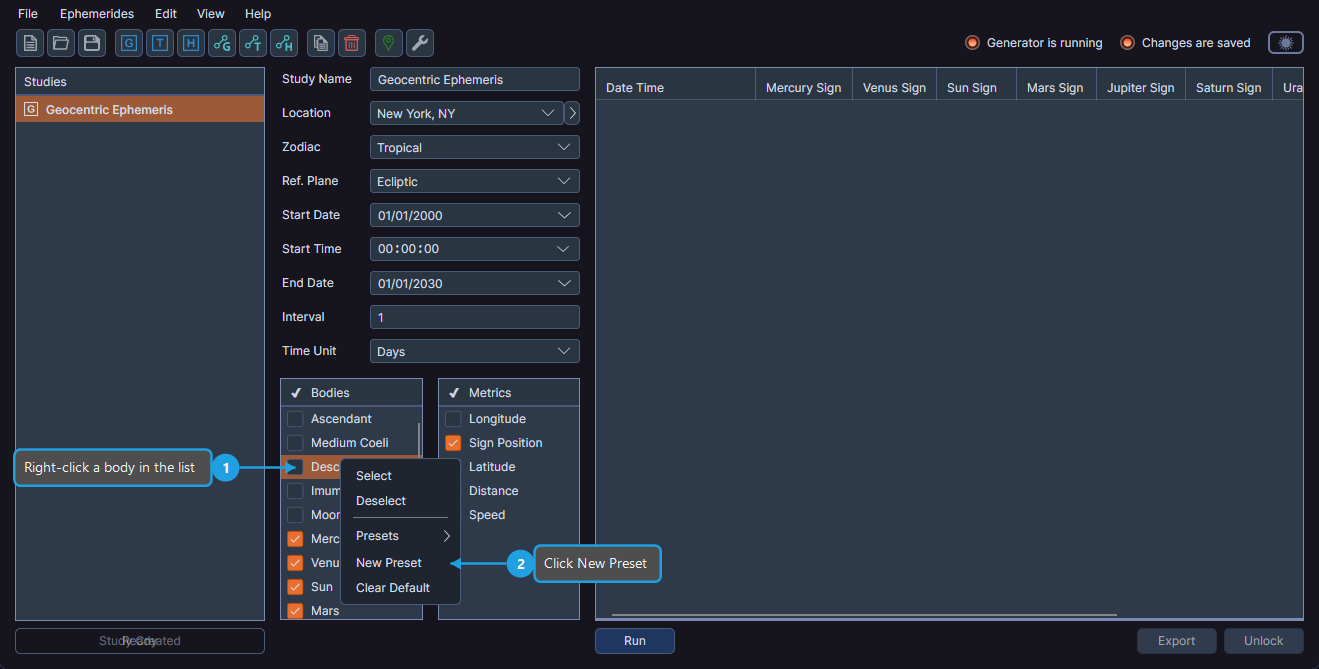
Creating a Bodies Preset
To save the current body selections as a new preset:
- Right-click on any row in the Bodies list.
- Click New Preset in the context menu.
- Enter a name for the new preset when prompted.
Applying a Bodies Preset
To apply a saved body selection preset to the current study:
- Right-click on any row in the Bodies list.
- Click Presets to expand the presets submenu.
- Click the desired preset name.
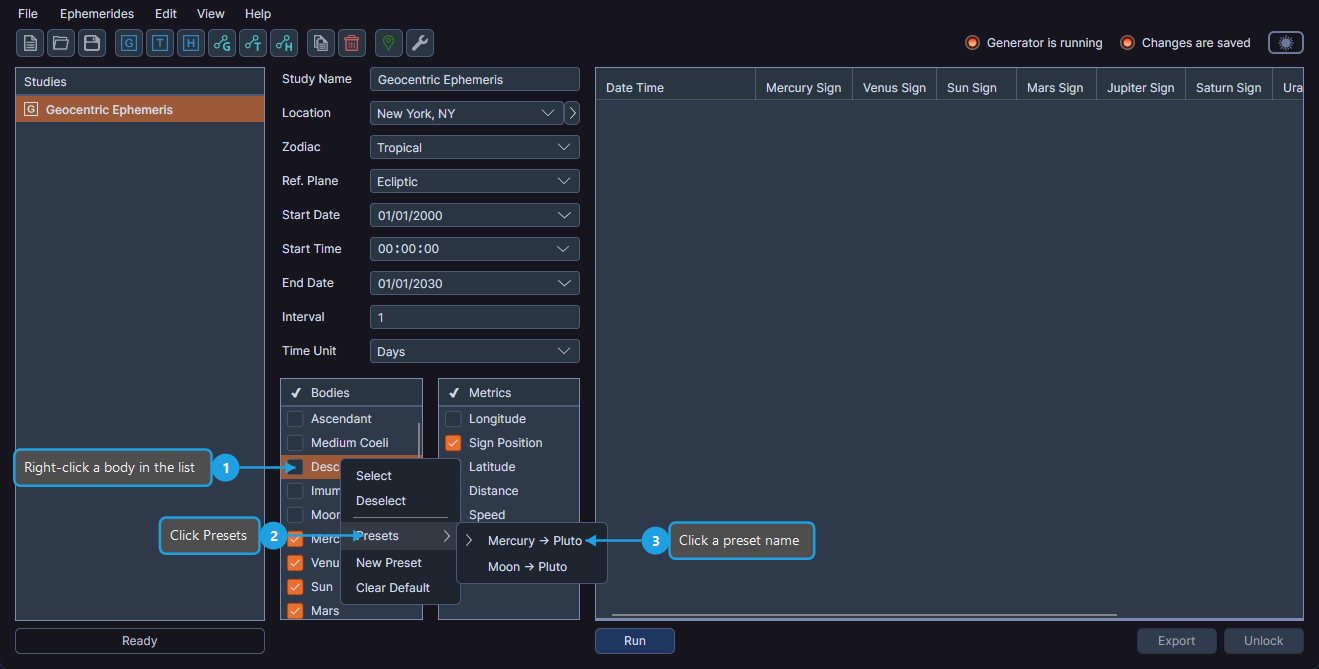
The preset updates the body selections to match.
Setting a Default Bodies Preset
You can designate a bodies preset as the default, which is automatically applied to new studies.
- Right-click on any row in the Bodies list.
- Click Presets to expand the presets submenu.
- Right-click the desired preset.
- Click Set Default in the context menu.
Clearing the Default Bodies Preset
To stop automatically applying a bodies preset to new studies:
- Right-click on any row in the Bodies list.
- Click Clear Default in the context menu.
Renaming a Bodies Preset
- Right-click on any row in the Bodies list.
- Click Presets to expand the presets submenu.
- Right-click the desired preset.
- Click Rename in the context menu.
Replacing a Bodies Preset
To update an existing preset with the current body selections:
- Right-click on any row in the Bodies list.
- Click Presets to expand the presets submenu.
- Right-click the desired preset.
- Click Replace in the context menu.
Deleting a Bodies Preset
- Right-click on any row in the Bodies list.
- Click Presets to expand the presets submenu.
- Right-click the desired preset.
- Click Delete in the context menu.
note
Bodies presets require a selected, unlocked study. Unlock the study first if it has completed generation.