Save Workspace
Saving writes the whole workspace to a single .aquila file: every study, its complete configuration, and the events it has generated. That file is both your record of the research and the thing you hand to a colleague.
Two commands write the file. Save writes back to the file the workspace came from, and Save As always asks for a new location and then continues working in the newly named file. Either way, the Changes are saved lamp lights once the write completes.
Save the Workspace
A workspace that has never been written to disk has no file to save back to, so its first save follows the Save As path instead and asks where to put it.
To write the workspace back to the file it came from:
- Open the File Menu.
- Click Save in the File menu.
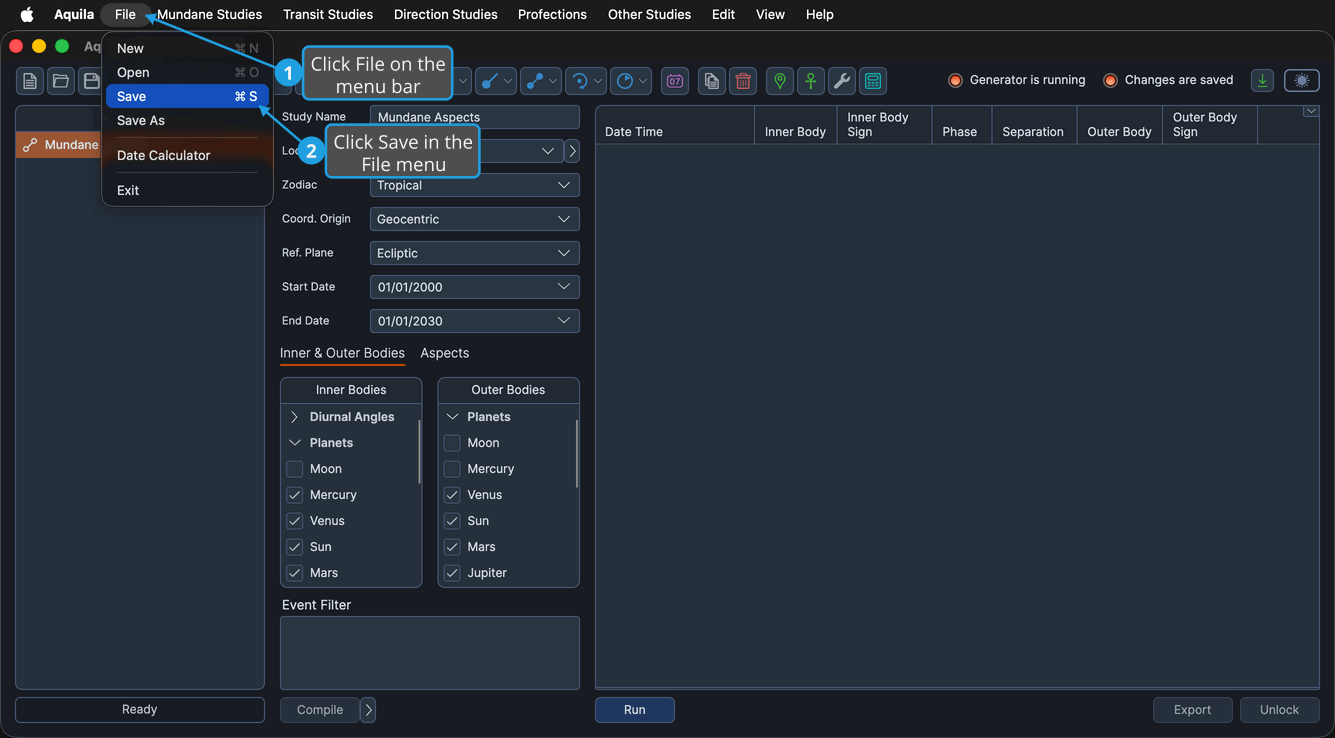
Press Cmd+S (Ctrl+S on Windows) to save without opening the menu. The Save button on the toolbar does the same thing.
The command is available when the workspace has unsaved changes, is not locked by a save or a load, and no study is generating events or compiling its event filter.
Save the Workspace Under a New Name
Saving under a new name is how you branch a piece of research: keep the original file as it stands and carry on in a copy, or hand a colleague a named version without disturbing your own.
To write the workspace to a newly named file:
- Open the File Menu.
- Click Save As in the File menu.
- Name the destination file in the save-file dialog and click Save.
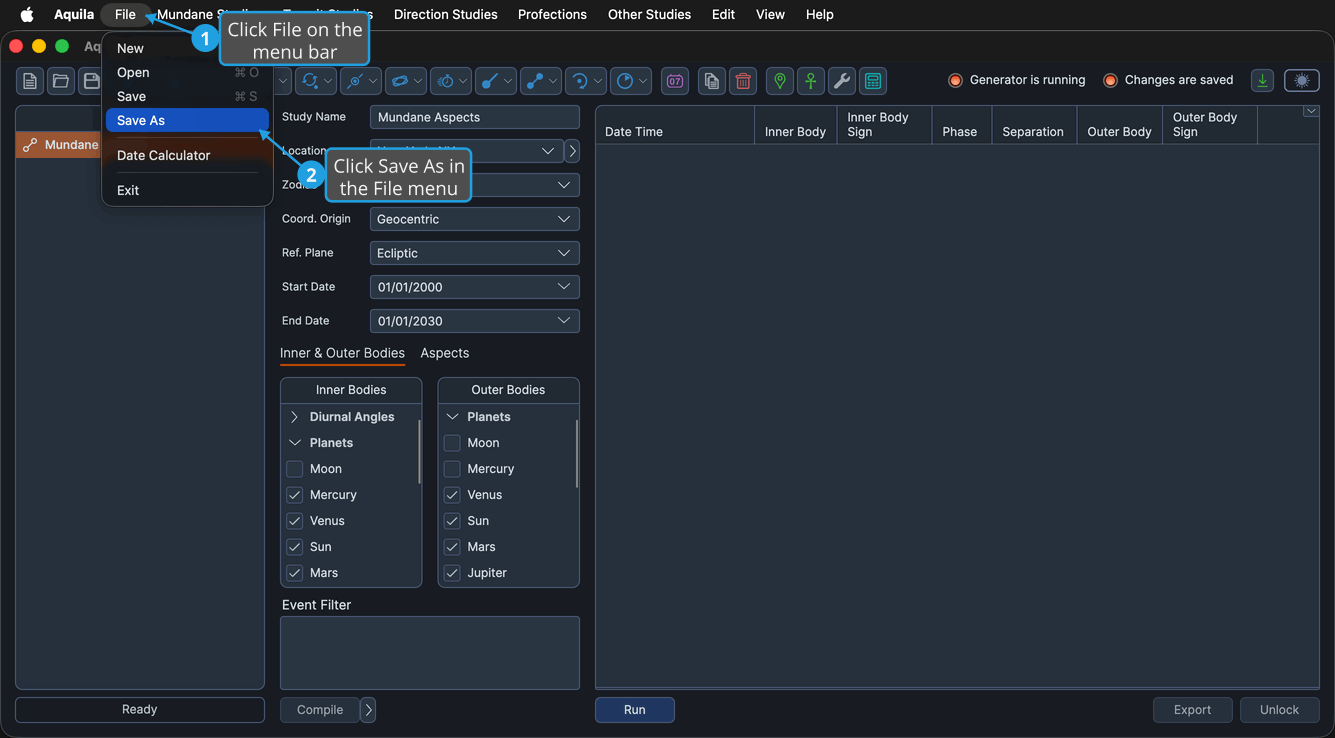
Aquila writes the workspace to the file you chose. The workspace takes that file's name and continues from there. Later saves write back to the new file, not the old one.
Choose a Destination in the Save File Dialog
The save-file dialog is your operating system's own file picker, raised by any command that writes a file. On Save As it opens with the workspace's name already filled in and an .aquila extension applied.
To name a destination:
- Select the destination folder in the file list.
- Type the file name.
- Click Save.
The dialog closes and the command writes the file to the path you named.
Cancel the Save File Dialog
Backing out of the picker writes nothing. The command that raised the dialog ends and the workspace is left exactly as it was, unsaved changes included.
To close the dialog without naming a destination:
- Click Cancel in the save-file dialog.