Copy Timeline Events
Findings usually have to leave the application to be useful: a date lifted into a note, a stretch of events pasted into a document, a block of rows dropped into a spreadsheet. Copy Timeline Events puts data from the Timeline table on the clipboard without exporting the whole timeline.
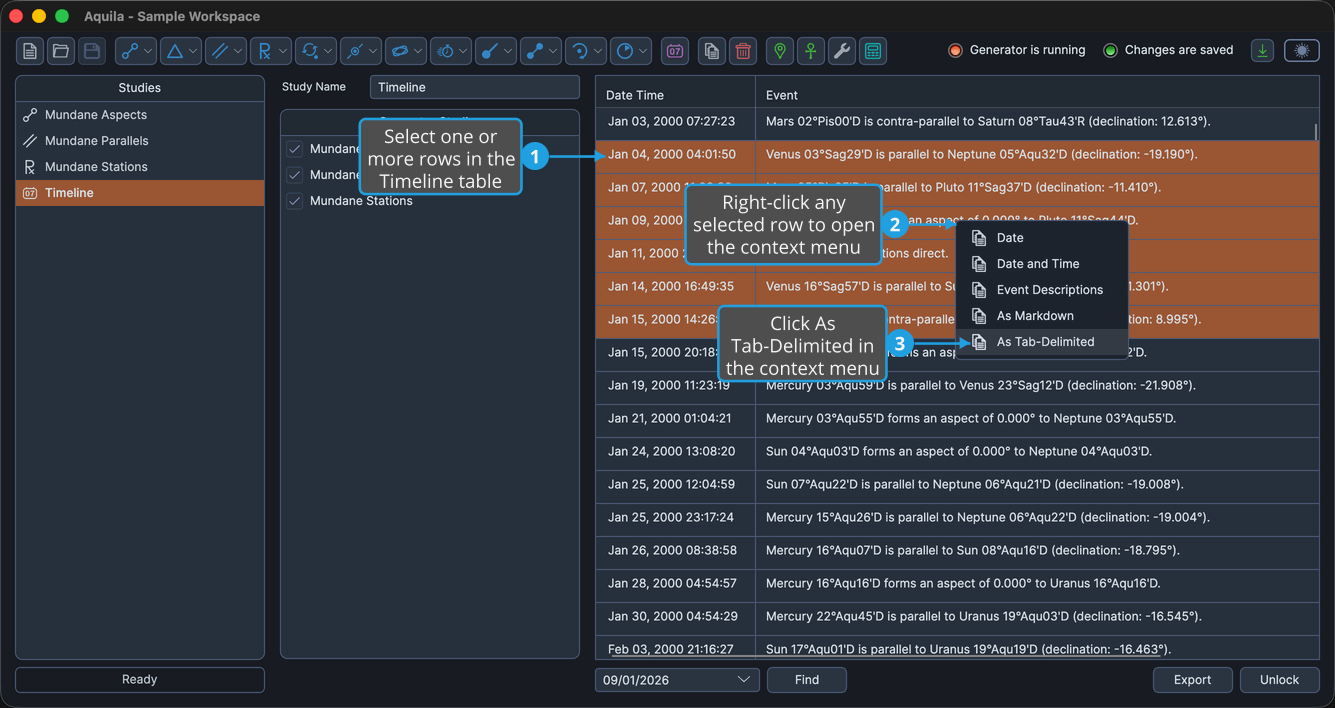
Right-clicking a row in the Timeline table opens a menu of five copy commands, each producing a different shape of clipboard content.
The Copy Menu
| Command | What It Copies |
|---|---|
| Date | The selected row's date |
| Date and Time | The selected row's date and time |
| Event Descriptions | One line per selected row, each carrying the event's date and time followed by its description |
| As Markdown | The selected rows as a Markdown table |
| As Tab-Delimited | The selected rows as tab-separated text |
Date and Date and Time act on the one selected row. Event Descriptions, As Markdown and As Tab-Delimited act on every selected row. See Timeline Table for how to select a range of rows.
For the three multi-row formats, extend the selection with Shift-click or Cmd-click before opening the menu to copy more than one event at a time. On Windows use Ctrl-click in place of Cmd-click.
Copy the Event Date
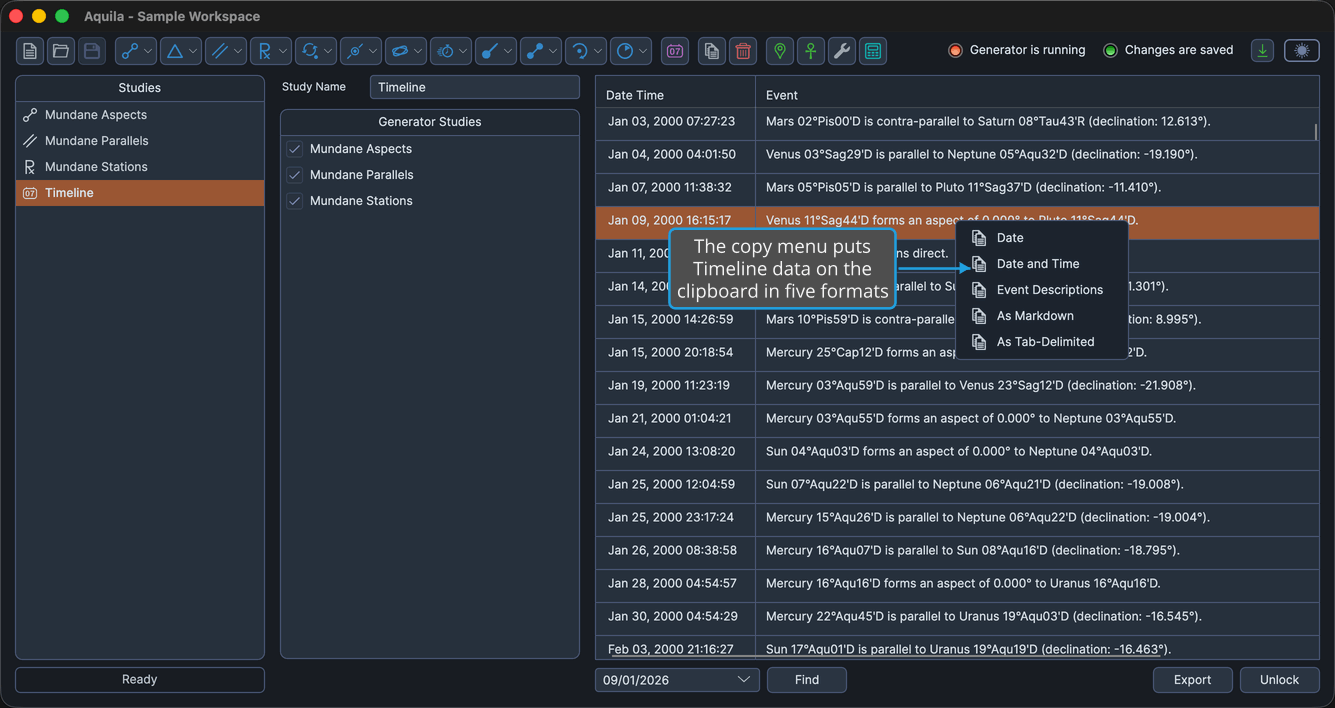
To put the selected row's date on the clipboard:
- Click a row in the Timeline table to select it.
- Right-click the selected row to open the context menu.
- Click Date in the context menu.
Copy the Event Date and Time
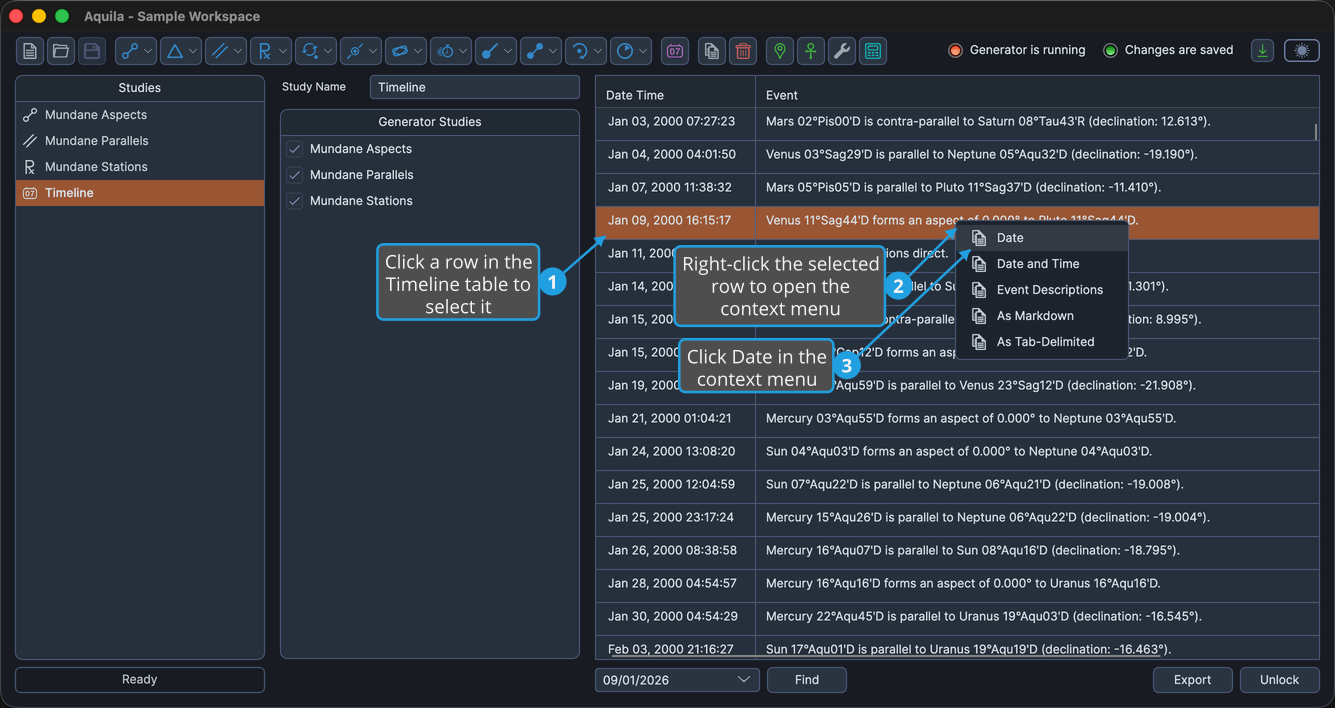
To put the selected row's date and time on the clipboard:
- Click a row in the Timeline table to select it.
- Right-click the selected row to open the context menu.
- Click Date and Time in the context menu.
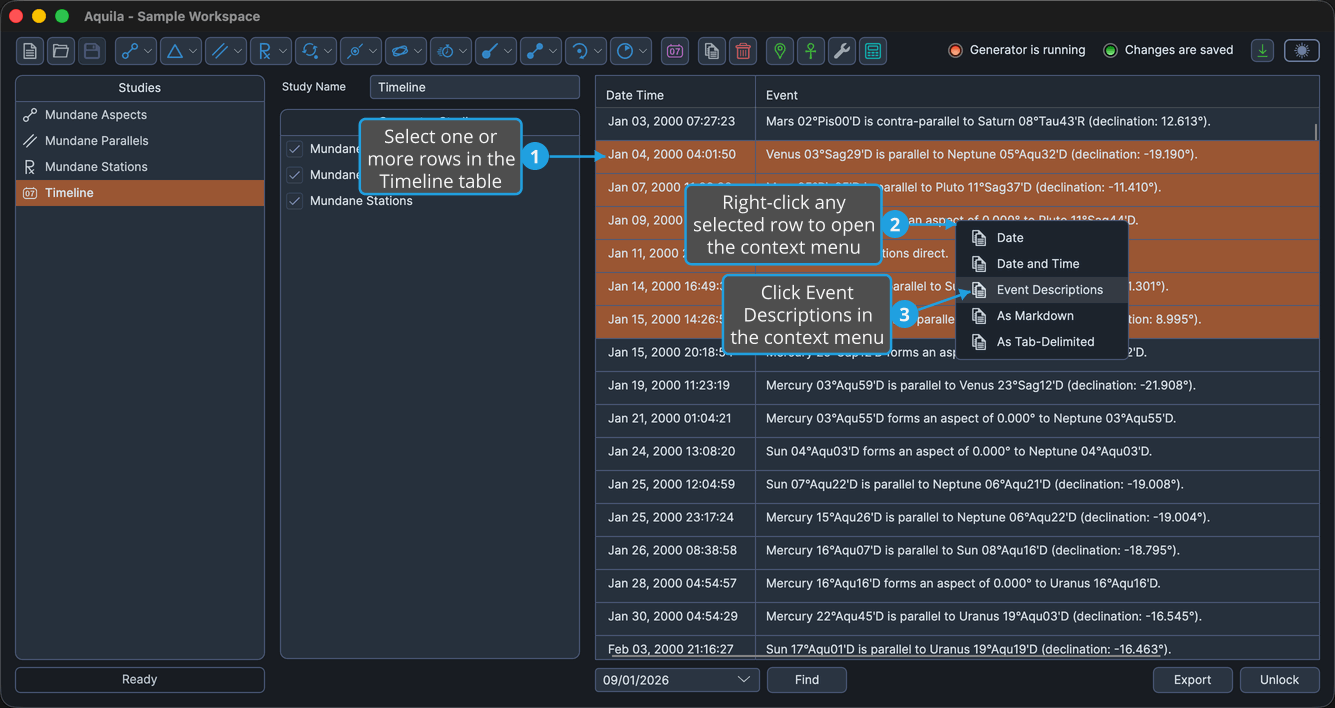
Copy the Event Descriptions
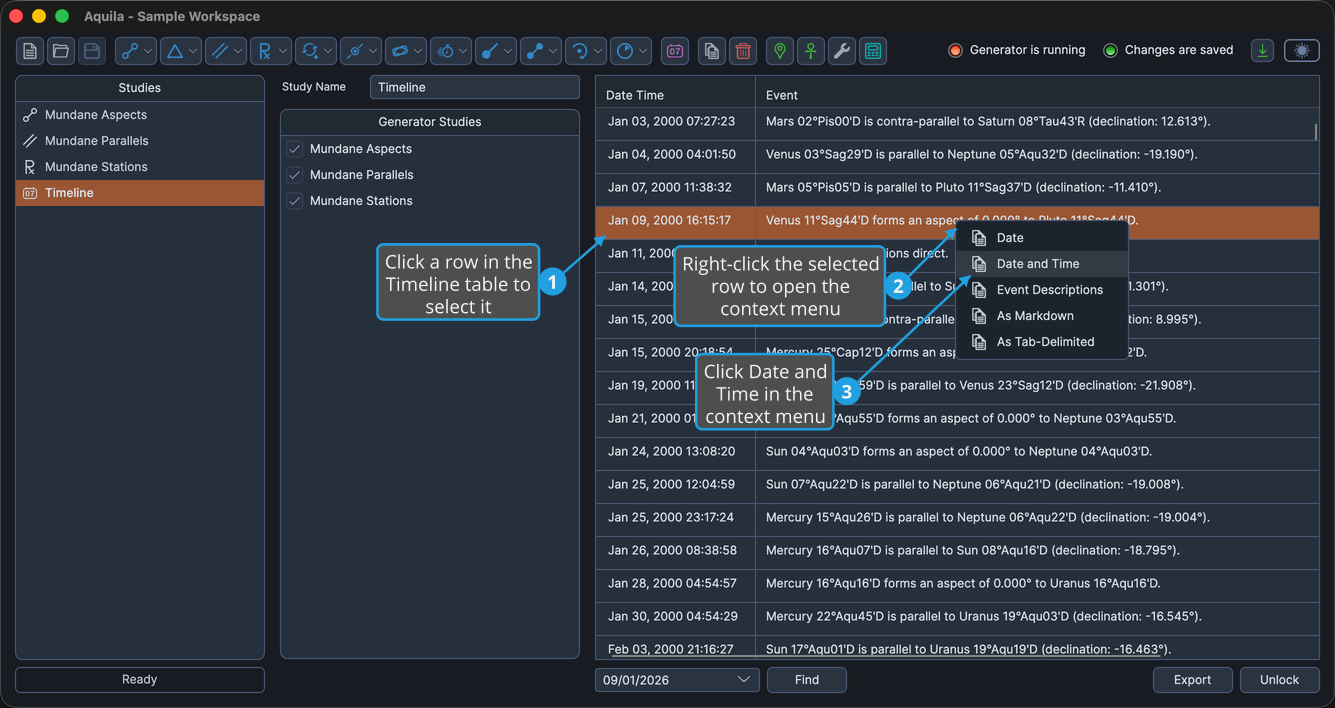
To put one line per selected row on the clipboard, each carrying the event's date and time followed by its description:
- Select one or more rows in the Timeline table.
- Right-click any selected row to open the context menu.
- Click Event Descriptions in the context menu.
Copy the Events as Markdown
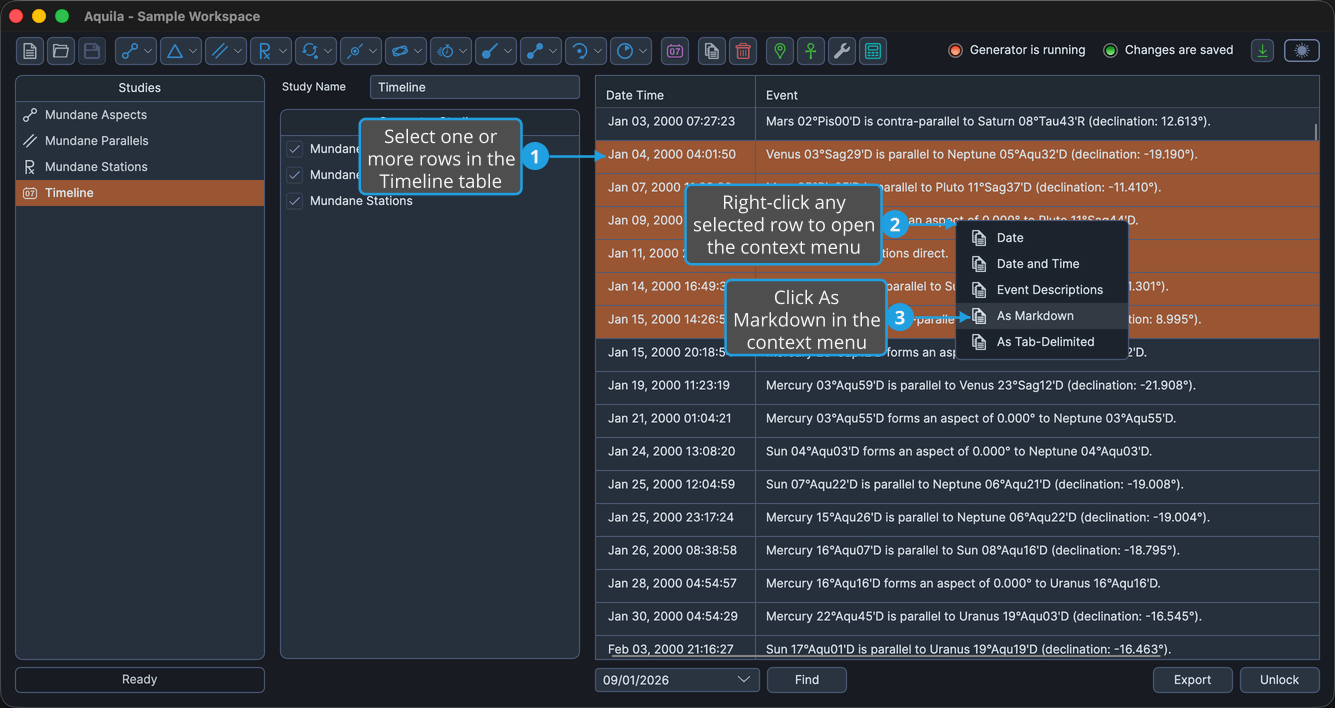
To put the selected rows on the clipboard as a Markdown table, ready for a note-taking application:
- Select one or more rows in the Timeline table.
- Right-click any selected row to open the context menu.
- Click As Markdown in the context menu.
Copy the Events as Tab-Delimited Text
To put the selected rows on the clipboard as tab-separated text, ready for a spreadsheet:
- Select one or more rows in the Timeline table.
- Right-click any selected row to open the context menu.
- Click As Tab-Delimited in the context menu.