Timeline Study
Research questions rarely stay inside one technique. A Timeline study aggregates the events of other studies in the workspace into one chronological list, so events produced by different techniques can be read side by side and the confluence between them becomes visible.
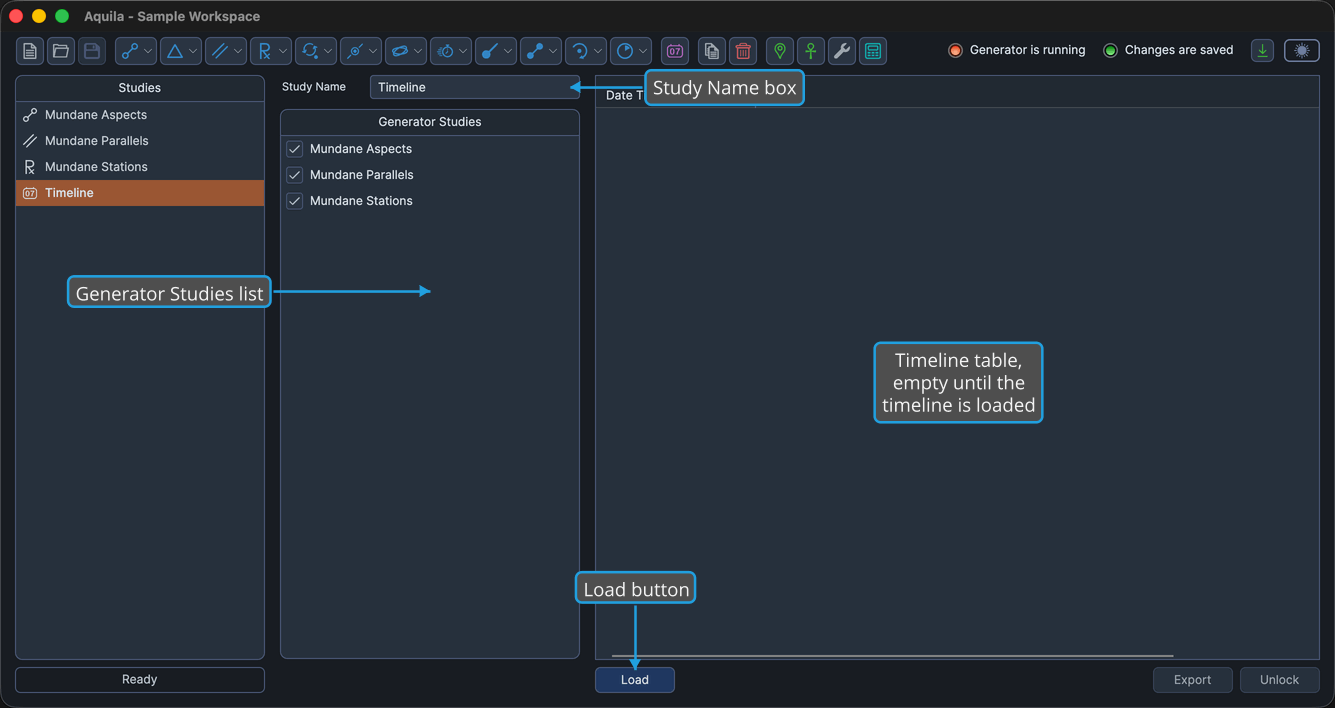
Unlike a generator study, a Timeline study generates no events of its own. It references the studies checked in its Generator Studies list and merges their already-generated events. Its settings column holds only a Study Name box and that list; the right-hand side is the Timeline table, with Load, Find, Export and Unlock along the bottom.
Create a Timeline Study
To add a Timeline study to the current workspace:
- Click Other Studies → Timeline Study on the menu bar.
Alternatively, click the New Timeline Study button on the toolbar, which creates the same study in a single click.
A study named "Timeline" appears at the bottom of the Studies list and is selected automatically. Its view opens with a Study Name box and an empty Generator Studies list on the left, and an empty Timeline table on the right.
Choose the Source Studies
The Generator Studies list in the settings column names every event-generating study in the open workspace, each with a checkbox. Check the studies whose events belong on this timeline, and give the study a name in the Study Name box so it is easy to pick out of the Studies list later. The list keeps itself in step with the workspace, so studies appear as they are created and drop out as they are deleted. For the context menu that checks and unchecks several rows at once, see Timeline Source Study Selection.
Nothing has been merged at this stage. The Timeline table on the right stays empty, the Load button waits at the bottom-left, and you can change the checkboxes freely for as long as the timeline is unlocked.
The Loaded Timeline
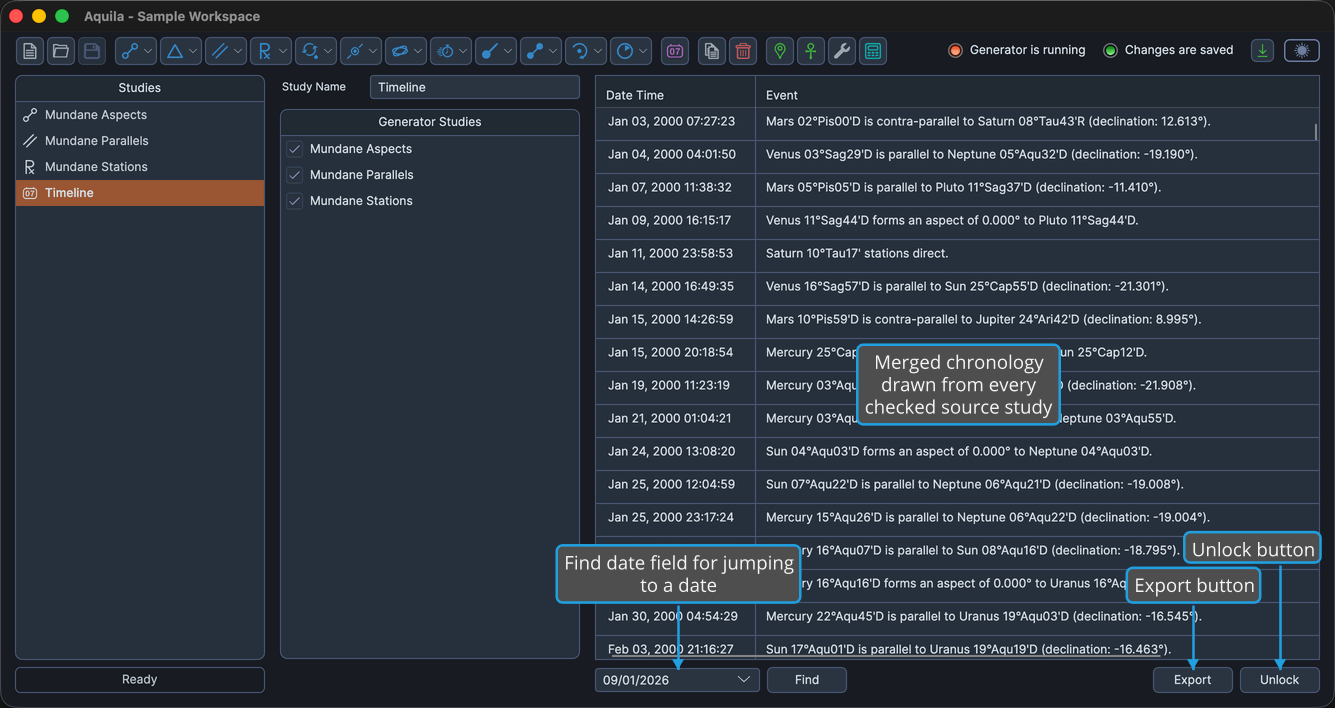
Clicking Load gathers the events of every checked study and merges them into the Timeline table in date order. Each source study must have generated its own events first: a study that has not yet been generated contributes no rows to the merged list.
Loading locks the timeline. The Generator Studies list becomes read-only, the Load button gives way to a date field and a Find button, and Unlock becomes available beside Export at the bottom-right. The merged list then keeps itself current, so re-generating or deleting a source study updates the rows already loaded without a second Load.
The result is a single two-column chronology, Date Time and Event, drawn from as many techniques as were checked. Reading down it shows how findings from different studies fall relative to one another, which is the whole purpose of a Timeline study.
In This Section
- Timeline Source Study Selection: pick the generator studies the timeline draws from.
- Load Timeline Events: merge the selected studies' events into the table.
- Unlock Timeline: return a loaded timeline to its editable state.
- Timeline Table: read the merged chronology in the two-column results table.
- Copy Timeline Events: put dates and descriptions on the clipboard.
- Find Timeline Event by Date: jump a long timeline to a chosen period.
- Export Timeline: write the merged chronology out to CSV.