Copy Events
Not every result needs a file. A date for a note, a handful of event descriptions for a message, a block of rows for a spreadsheet: the copy commands move event data out of Aquila and onto the clipboard without exporting the whole result set.
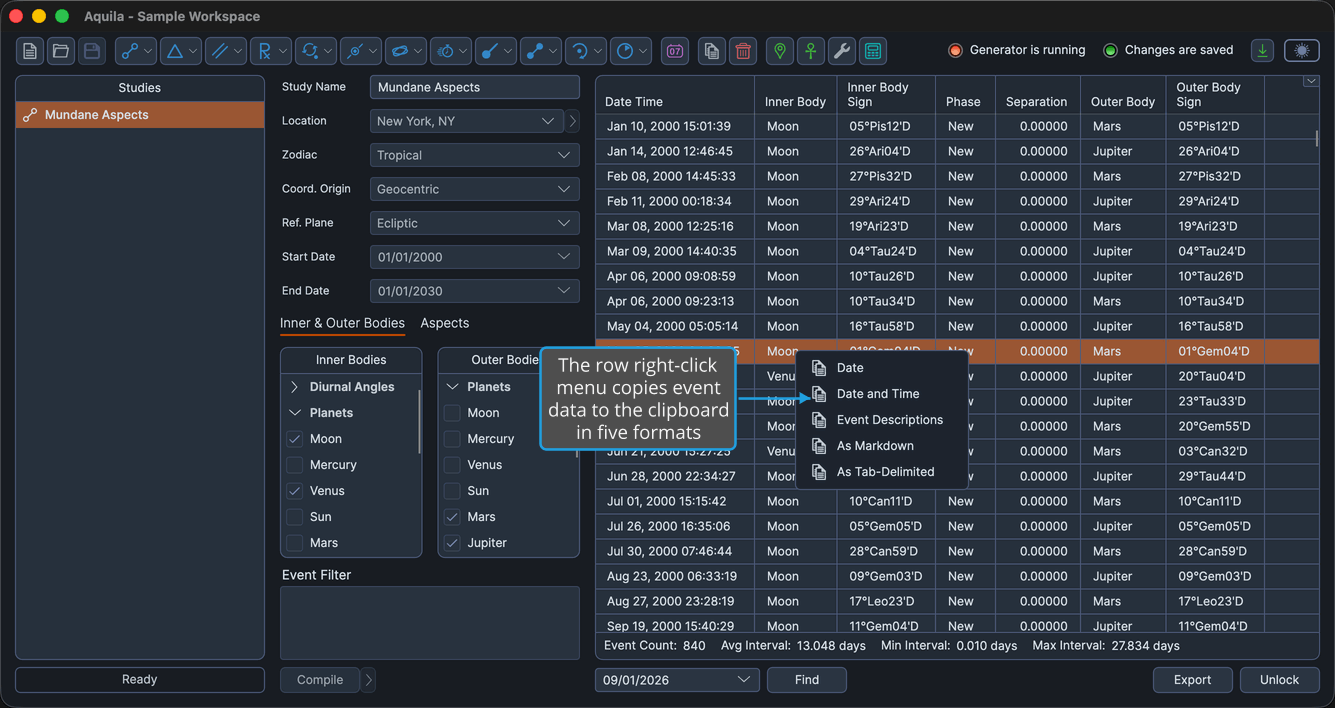
Right-clicking a row in the events table opens a menu of five copy commands.
The Row Right-Click Menu
| Command | What It Copies |
|---|---|
| Date | The selected event's date. |
| Date and Time | The selected event's date and time. |
| Event Descriptions | One line per selected event, each carrying the event's date and time followed by its description. |
| As Markdown | The selected events as a Markdown table with a header row. |
| As Tab-Delimited | The selected events as tab-separated text with a header row. |
Date and Date and Time work on the one selected row. Event Descriptions, As Markdown and As Tab-Delimited work on the whole selection, so extending the selection across several rows first copies a block of events in one gesture. See Events Table for how to select a range of rows.
Cmd-click to toggle individual rows in the selection; Shift-click to extend the selection to a range. On Windows use Ctrl-click in place of Cmd-click.
Both table formats follow the table as it stands on screen, using the columns currently visible in it. A column you have hidden stays out of what lands on the clipboard, so arranging the table before copying shapes the result. See Choose Events Table Columns and Reorder Events Table Columns.
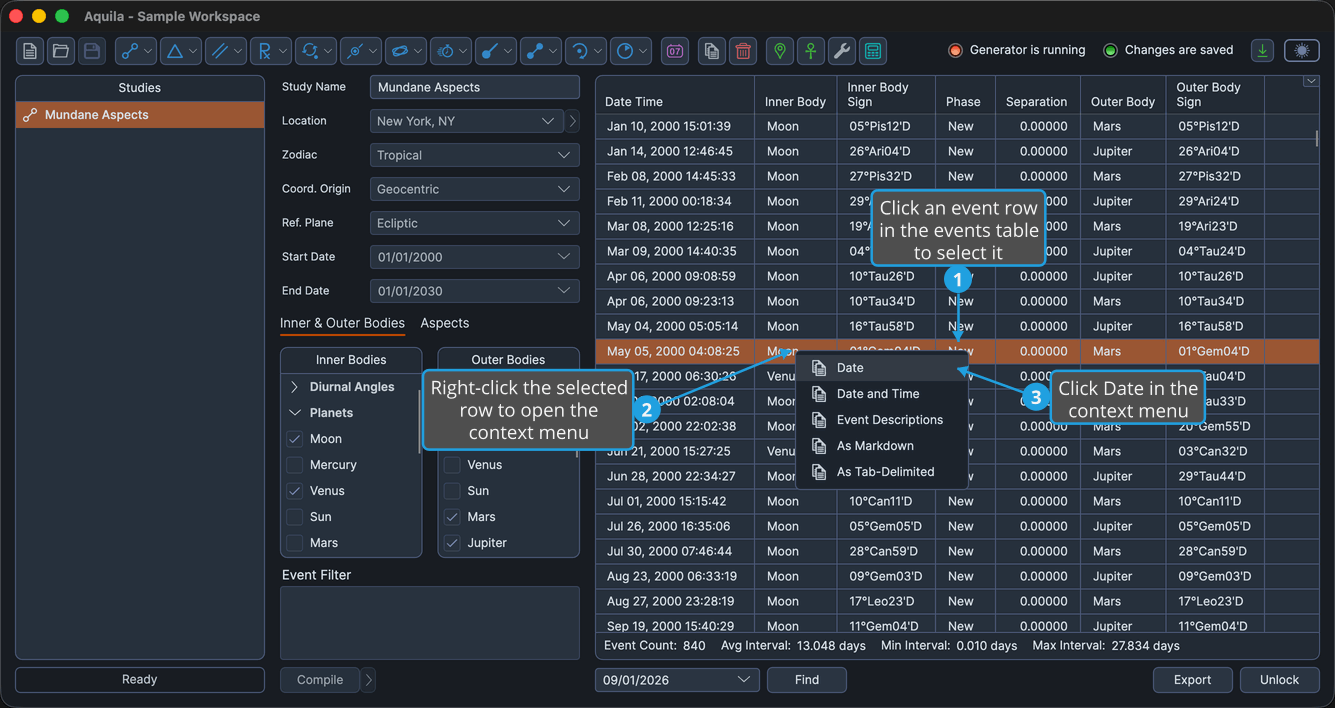
Copy an Event's Date
To put a single event's date on the clipboard:
- Click an event row in the events table to select it.
- Right-click the selected row to open the context menu.
- Click Date in the context menu.
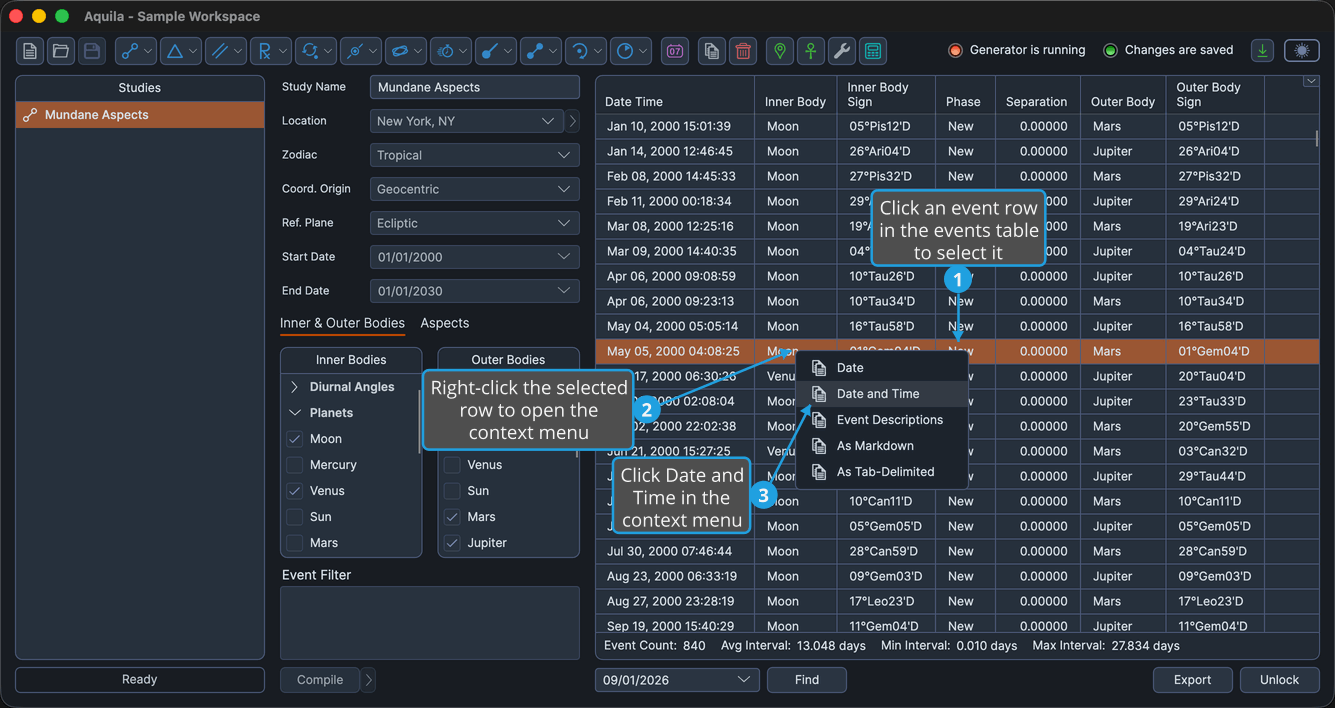
Copy an Event's Date and Time
To put a single event's date and time on the clipboard:
- Click an event row in the events table to select it.
- Right-click the selected row to open the context menu.
- Click Date and Time in the context menu.
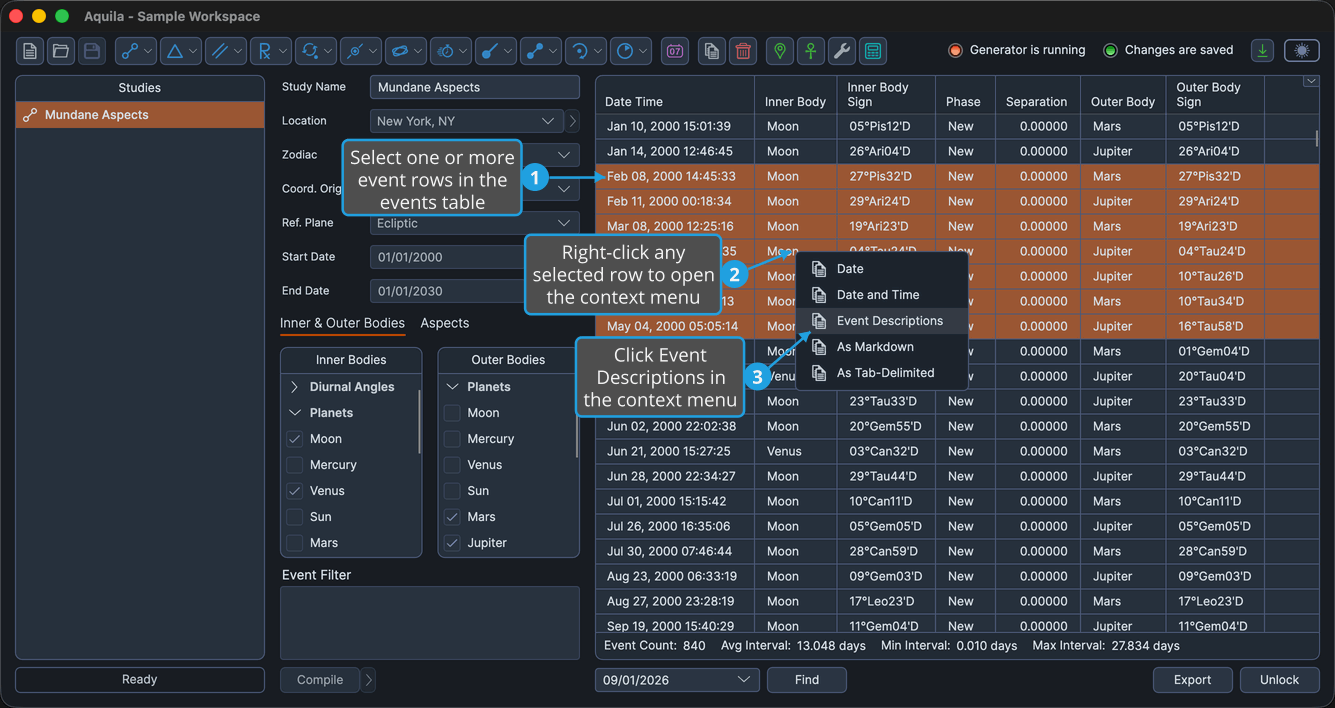
Copy Event Descriptions
Event Descriptions writes plain text, one line per event, each line carrying the event's date and time followed by the description the study generated for it. It suits notes and correspondence, where a table would be more structure than the point needs.
To put the selected events on the clipboard as descriptions:
- Select one or more event rows in the events table.
- Right-click any selected row to open the context menu.
- Click Event Descriptions in the context menu.
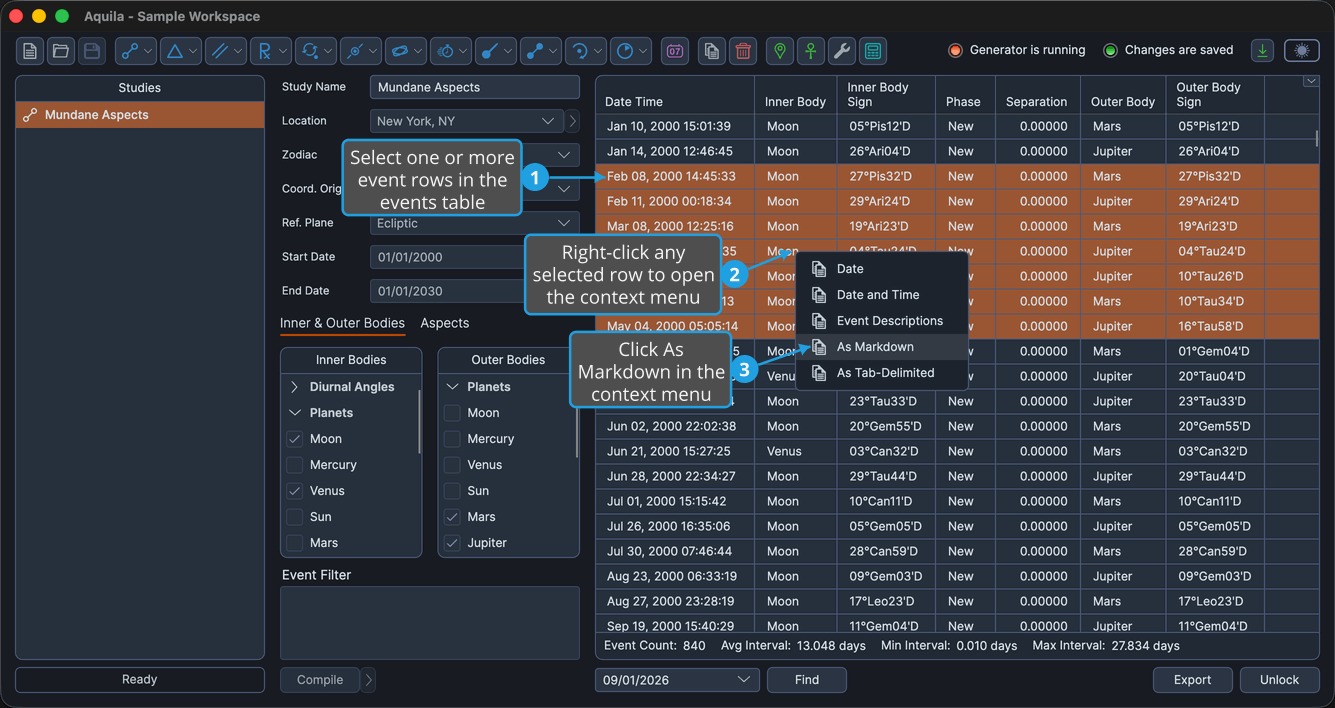
Copy Events as Markdown
As Markdown writes the selected events as a Markdown table with a header row, which pastes into a note-taking application as a formatted table rather than as raw text.
To put the selected events on the clipboard as a Markdown table:
- Select one or more event rows in the events table.
- Right-click any selected row to open the context menu.
- Click As Markdown in the context menu.
Copy Events as Tab-Delimited Text
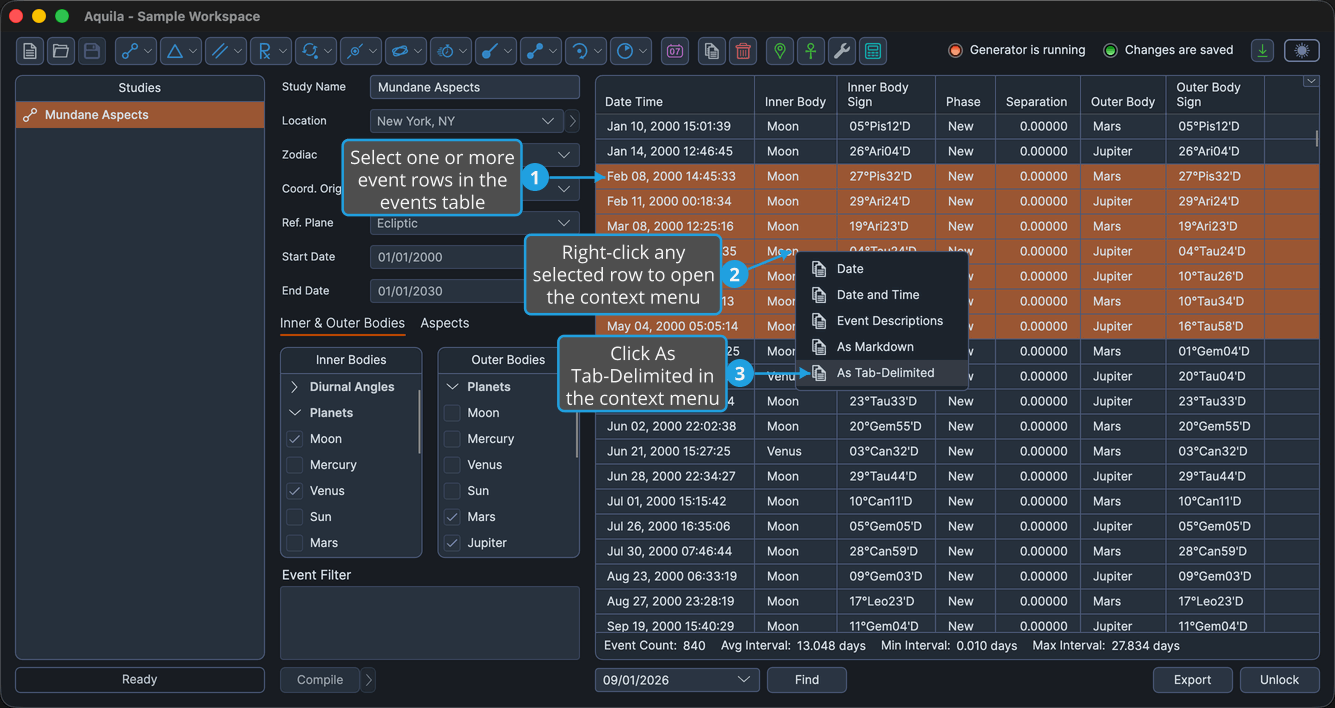
As Tab-Delimited writes the selected events as tab-separated text with a header row, which pastes into a spreadsheet as columns and rows ready to work with.
To put the selected events on the clipboard as tab-separated text:
- Select one or more event rows in the events table.
- Right-click any selected row to open the context menu.
- Click As Tab-Delimited in the context menu.
For a whole result set rather than a selection, write the events to a CSV file instead. See Export Events.