Transit Chart Configuration
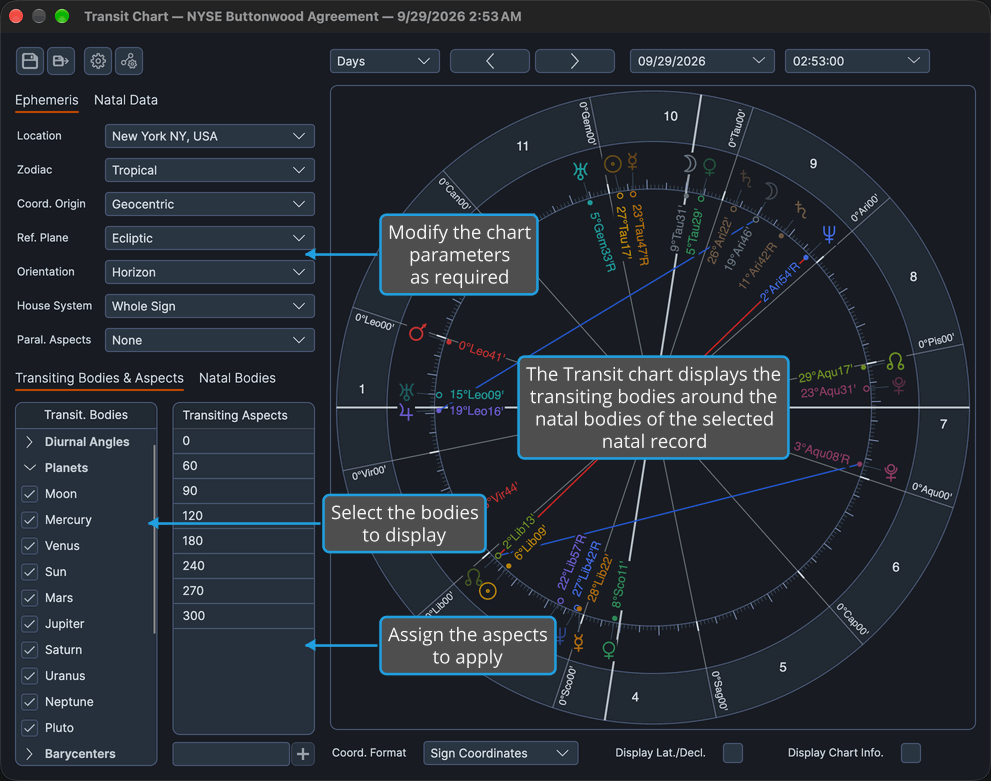
The settings panel of a Transit chart window decides the transiting place and frame, the person the transits are measured against, and which bodies and aspects the chart shows. Use the Ephemeris tab for the location, the frame and Paral. Aspects; the Natal Data tab for the natal record; and the lower pair of tabs for the transiting and natal bodies and the aspect angles.
Settings Panel Layout
The panel holds two pairs of tabs. The upper pair is Ephemeris and Natal Data; the lower pair, which fills the rest of the column, is Transiting Bodies & Aspects and Natal Bodies.
| Tab | What It Holds |
|---|---|
| Ephemeris | The transiting side: Location, the frame rows Zodiac, Coord. Origin, Ref. Plane, Orientation and House System, and the Paral. Aspects drop-down. |
| Natal Data | The natal record the transits are measured against, with its Natal Date and Natal Time. |
| Transiting Bodies & Aspects | The Transit. Bodies list beside the Transiting Aspects grid. |
| Natal Bodies | The list of natal points plotted. An empty natal selection plots no natal points. |
The frame rows are described in Chart Frame, the two body lists in Chart Bodies Selection and the Transiting Aspects grid in Chart Aspect Angles.
Choose the Transit Chart's Location
Cast the transiting side of the chart for a different place. The Location drop-down lists the saved locations of the Locations database by name, in the order the database holds them; you create, edit, delete, import and export them in the Locations Editor (Edit → Locations), and changes made there appear in this drop-down at once.
- Click the Ephemeris tab.
- Select a location in the Location drop-down.
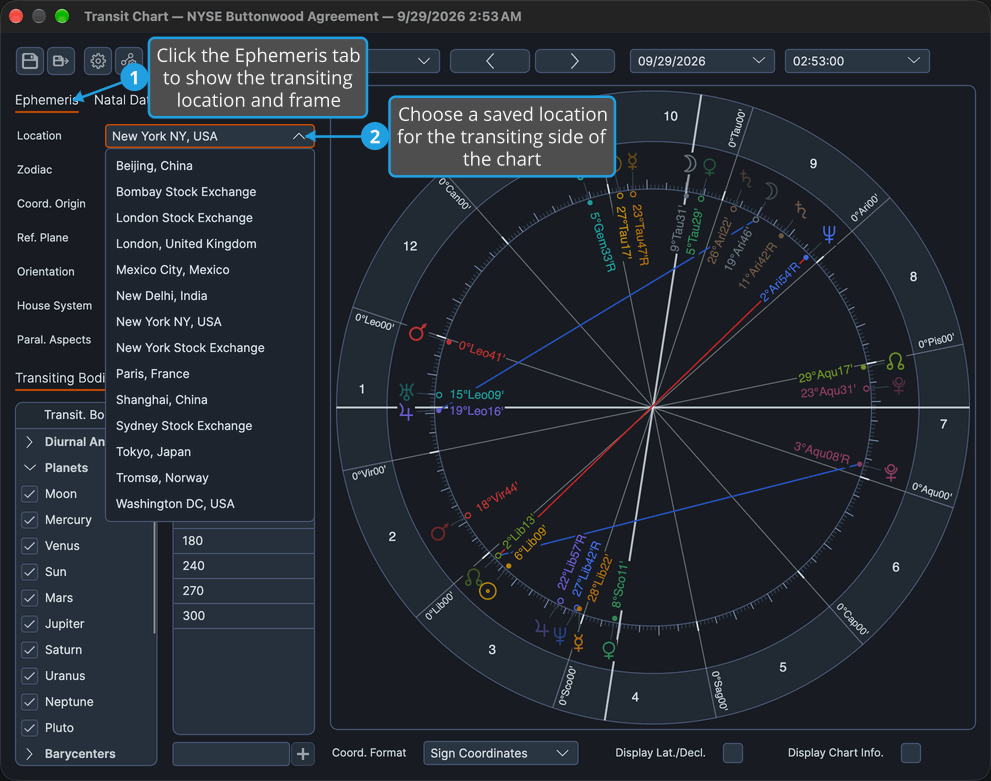
The chart redraws for the chosen transiting location, and the houses and angles follow it. A new Transit chart window opens at the default location set in General Chart Defaults.
Choose Which Parallels the Transit Wheel Draws
Decide which declination aspects the wheel draws as dashed chords.
- Click the Ephemeris tab.
- Select which parallels to draw in the Paral. Aspects drop-down.
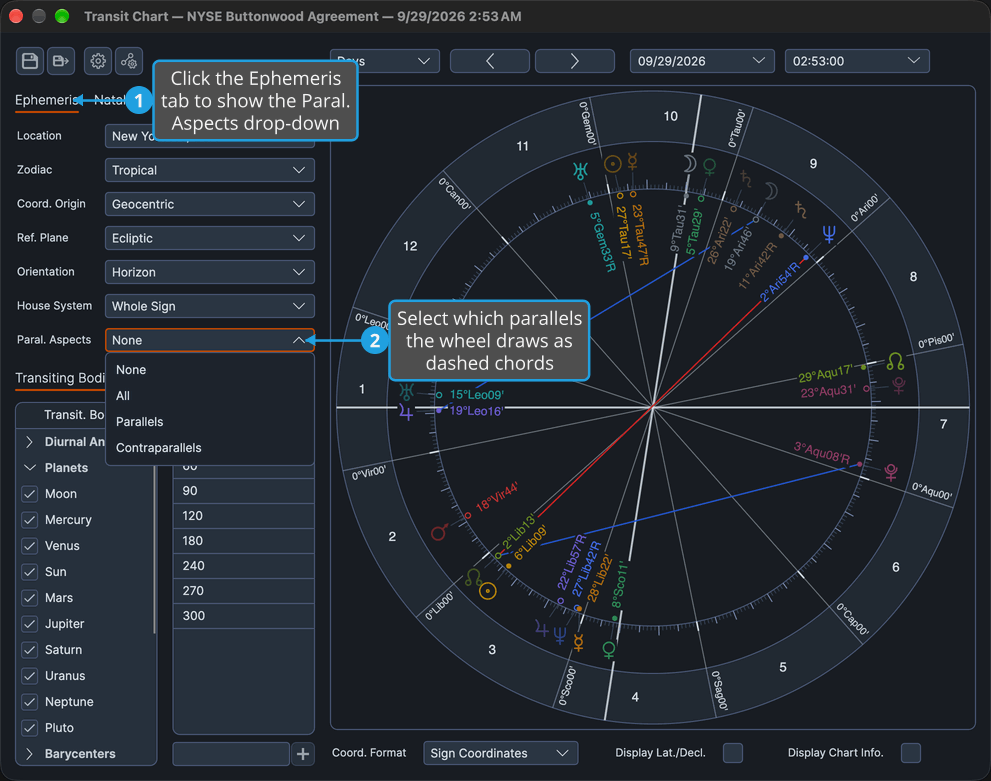
The wheel redraws with the chosen parallels, for this window only. The drop-down offers four options:
| Option | What the Wheel Draws |
|---|---|
| None | No parallel chords. |
| All | Both parallels and contraparallels. |
| Parallels | Parallels only. |
| Contraparallels | Contraparallels only. |
A new window takes this setting from the Chart Settings default, described in General Chart Defaults.
Choose the Natal Record for Transits
Choose the person the transits are measured against. The Natal Record drop-down lists the saved natal records of the Natal Records database, which you manage in the Natal Records Editor (Edit → Natal Records).
- Click the Natal Data tab.
- Select the record from the Natal Record drop-down.
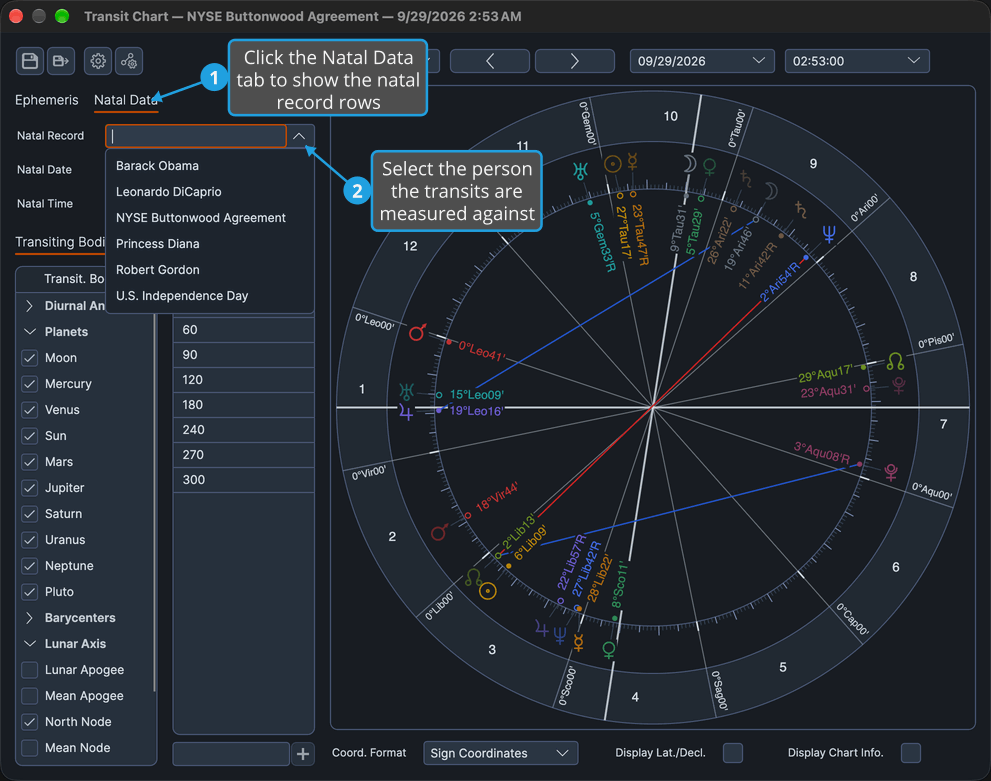
The drop-down is searchable. Once its list is open, typing part of a name narrows the list to the closest matches; click a record to choose it.
The natal points redraw for the chosen record, and aspects are matched between the transiting points and the new natal points.
Try a Different Birth Date and Time for Transits
Natal Date and Natal Time are filled in from the chosen natal record. They are there mainly for reference and normally stay as the record gives them, but they remain editable so you can vary the birth moment for what-if experiments without changing the stored record.
- Click the Natal Data tab.
- Click the Natal Date field to select its whole value.
- Type the date.
- Click the Natal Time field to select its whole value.
- Type the time and press Enter to commit it.
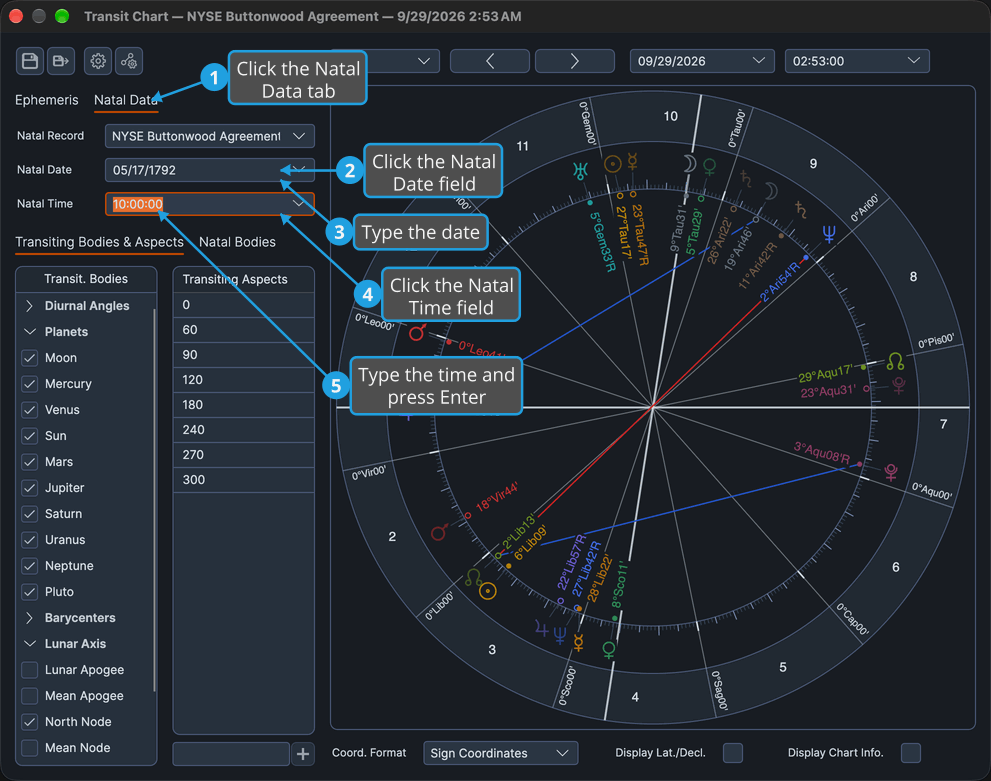
The natal points redraw for the edited moment, and the stored natal record is unchanged. The natal data rows are described in full in Natal Chart Configuration.
Related Topics
- Transit Chart: what a Transit chart is and how its window is laid out.
- Natal Chart Configuration: the Natal Record, Natal Date and Natal Time rows.
- Chart Frame: the frame rows on the Ephemeris tab.
- Chart Bodies Selection: the Transit. Bodies and Natal Bodies lists.
- Chart Aspect Angles: the Transiting Aspects grid.
- Chart Time Navigation: set and step the transiting date and time.
- General Chart Defaults: the location and settings a new Transit chart opens with.
- Locations Editor and Natal Records Editor: manage the places and natal records a chart draws on.