Filter Script Presets
A useful filter expression is hard-won and worth reusing across studies rather than retyping. A filter script preset saves the expression currently in the Event Filter editor under a name, so it can be loaded into any other study in a click.
Presets are reached from the small chevron button beside the Compile button, which opens a flyout offering Presets, New Preset and Clear Default. Right-clicking a name inside the Presets submenu offers Set Default, Rename, Replace and Delete.
Apply a Filter Script Preset
To load a saved expression into the study's Event Filter editor:
- Click the presets chevron button beside Compile.
- Click Presets in the flyout.
- Click the preset's name in the Presets submenu.
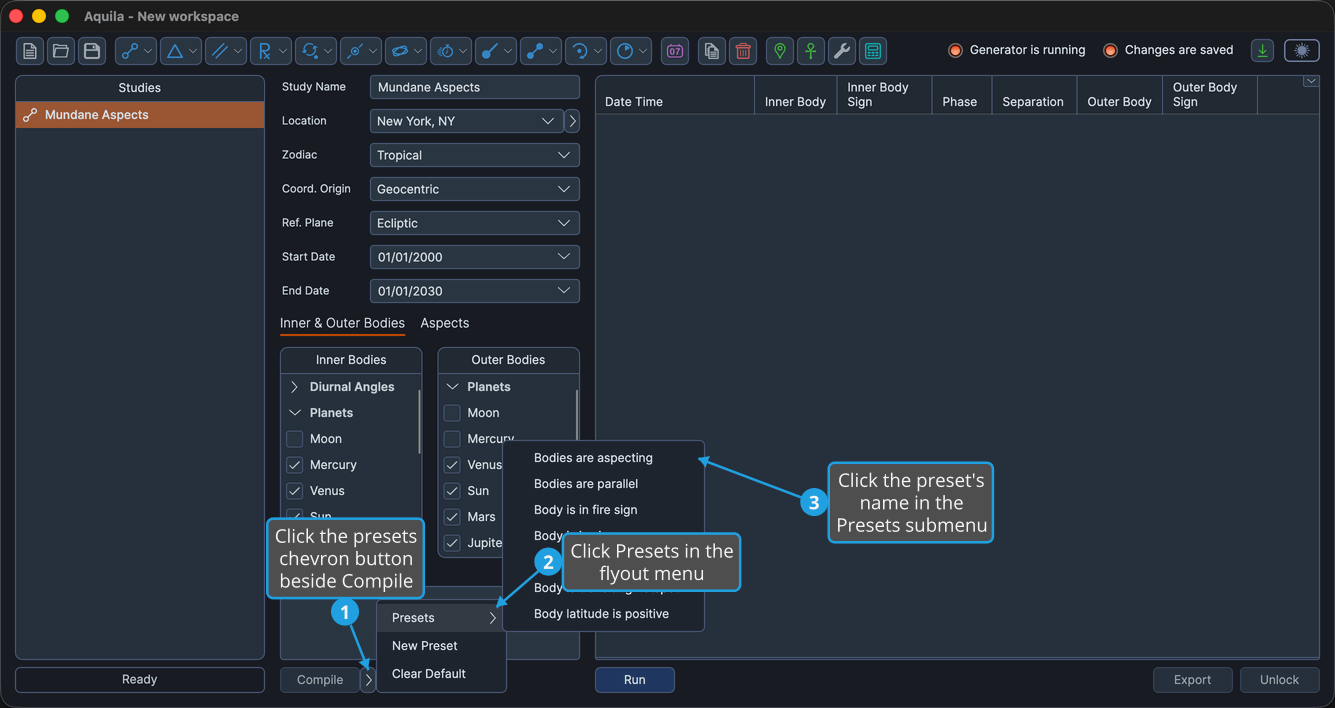
The preset's expression replaces whatever the editor held. A preset marked as the default carries a chevron beside its name.
Loading a preset changes the editor's text, so the filter still has to be compiled before the study's events can be generated. See Compile Filter Script.
Save a New Filter Script Preset
To keep the expression currently in the editor under a name:
- Click the presets chevron button beside Compile.
- Click New Preset in the flyout.
- Type a name in the prompt and click Save.
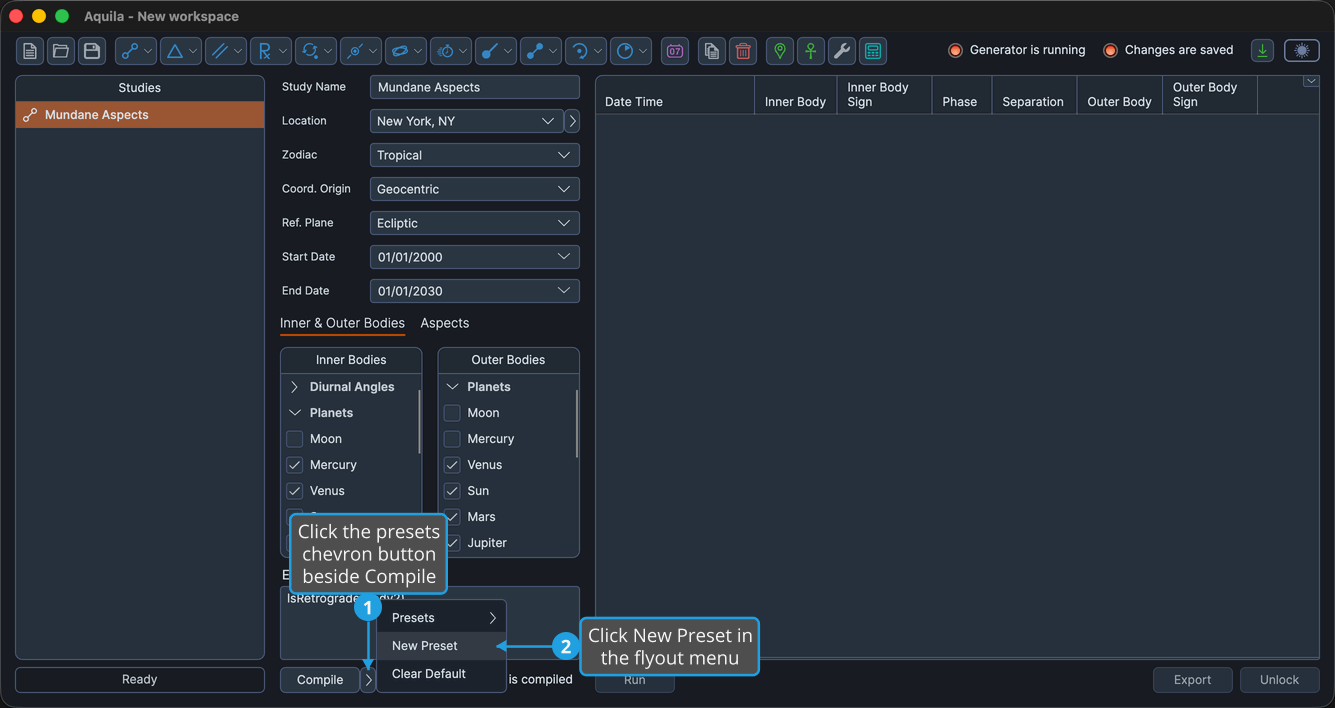
The new preset appears in the Presets submenu under the name you gave it.
Preset Name Dialog
The small prompt that collects the name opens with an empty box when a new preset is being saved, and pre-filled with the existing name when one is being renamed. Save is enabled only while the box holds text.
To name the preset:
- Type the preset name.
- Click Save.

Pressing Enter in the name box does the same thing, because Save is the prompt's default button. Click Cancel, or press Escape, to close the prompt without saving anything.
Set a Filter Script Preset as the Default
A study created afterward opens on the default preset. To mark one:
- Click the presets chevron button beside Compile.
- Click Presets in the flyout.
- Right-click the preset's name in the Presets submenu.
- Click Set Default in the preset's options menu.
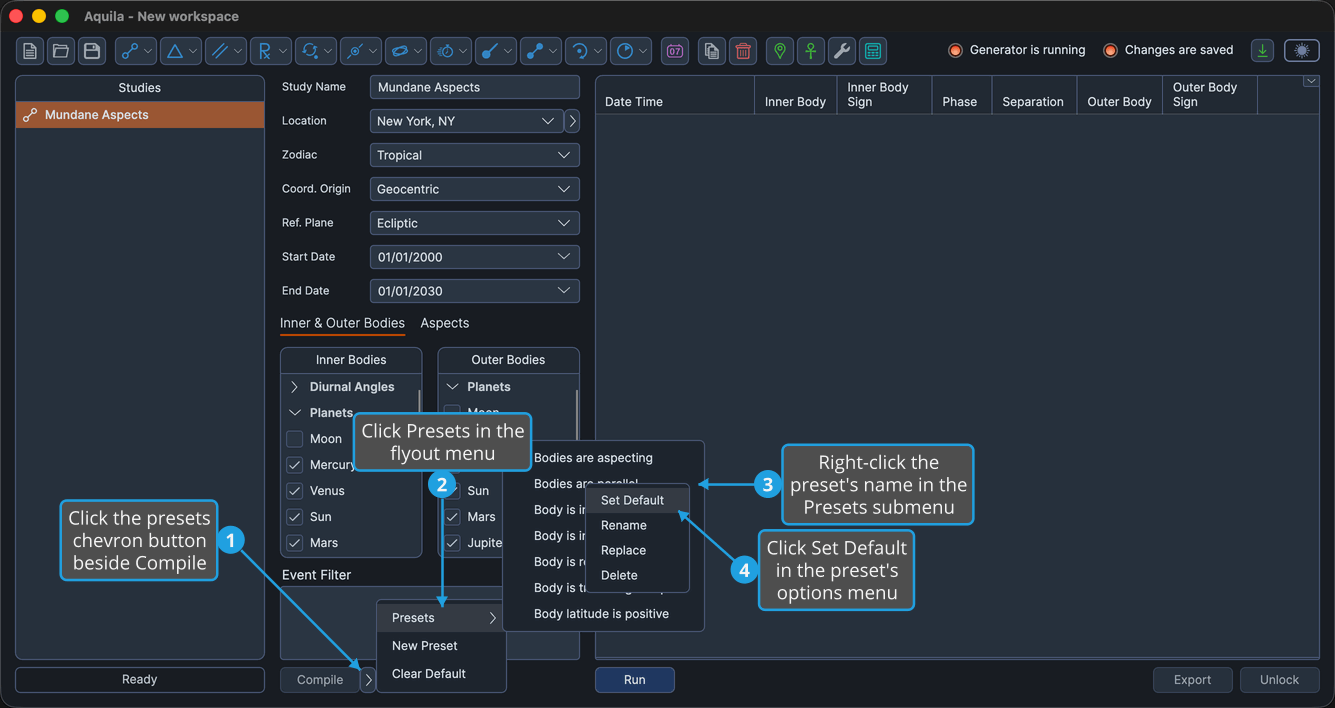
The preset is flagged with a chevron in the Presets submenu.
Clear the Default Filter Script Preset
To stop any preset being applied to newly created studies:
- Click the presets chevron button beside Compile.
- Click Clear Default in the flyout.
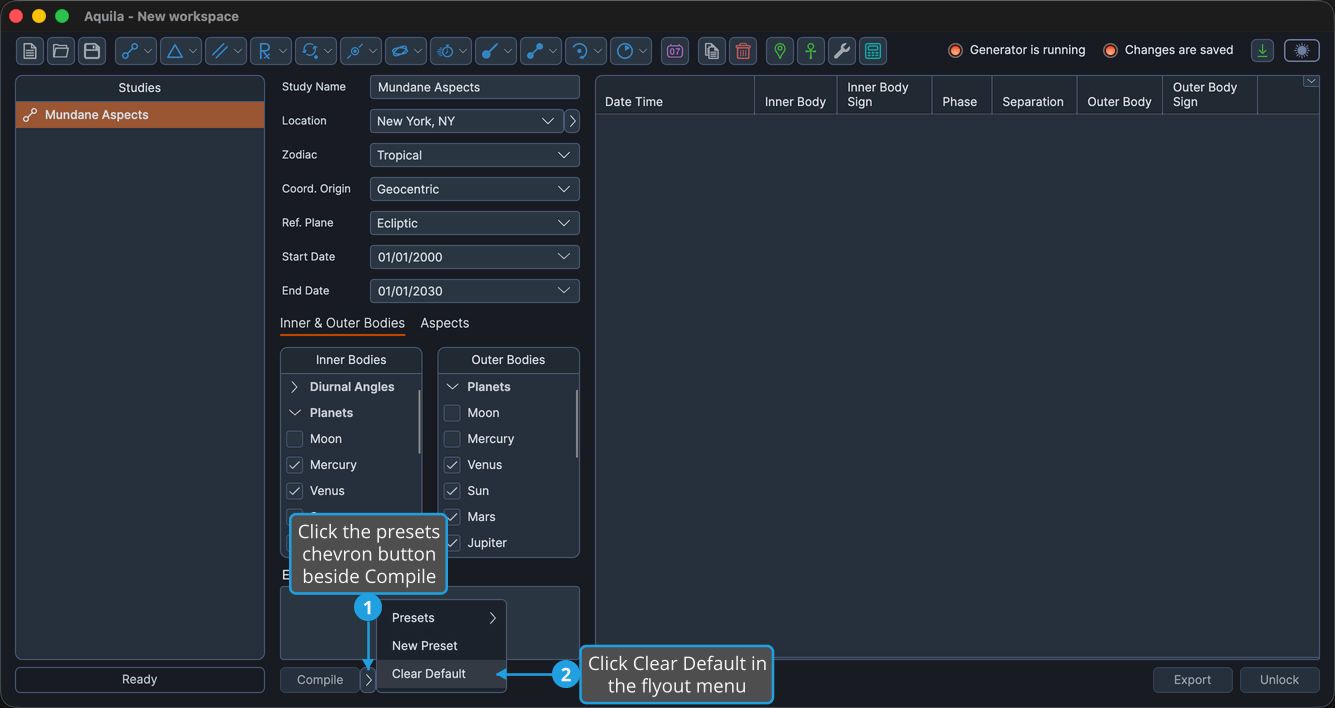
No preset carries the default chevron afterward, and studies created from then on start with an empty Event Filter editor.
Rename a Filter Script Preset
To give a saved preset a clearer name without changing the expression it holds:
- Click the presets chevron button beside Compile.
- Click Presets in the flyout.
- Right-click the preset's name in the Presets submenu.
- Click Rename in the preset's options menu.
- Type the new name in the prompt and click Save.
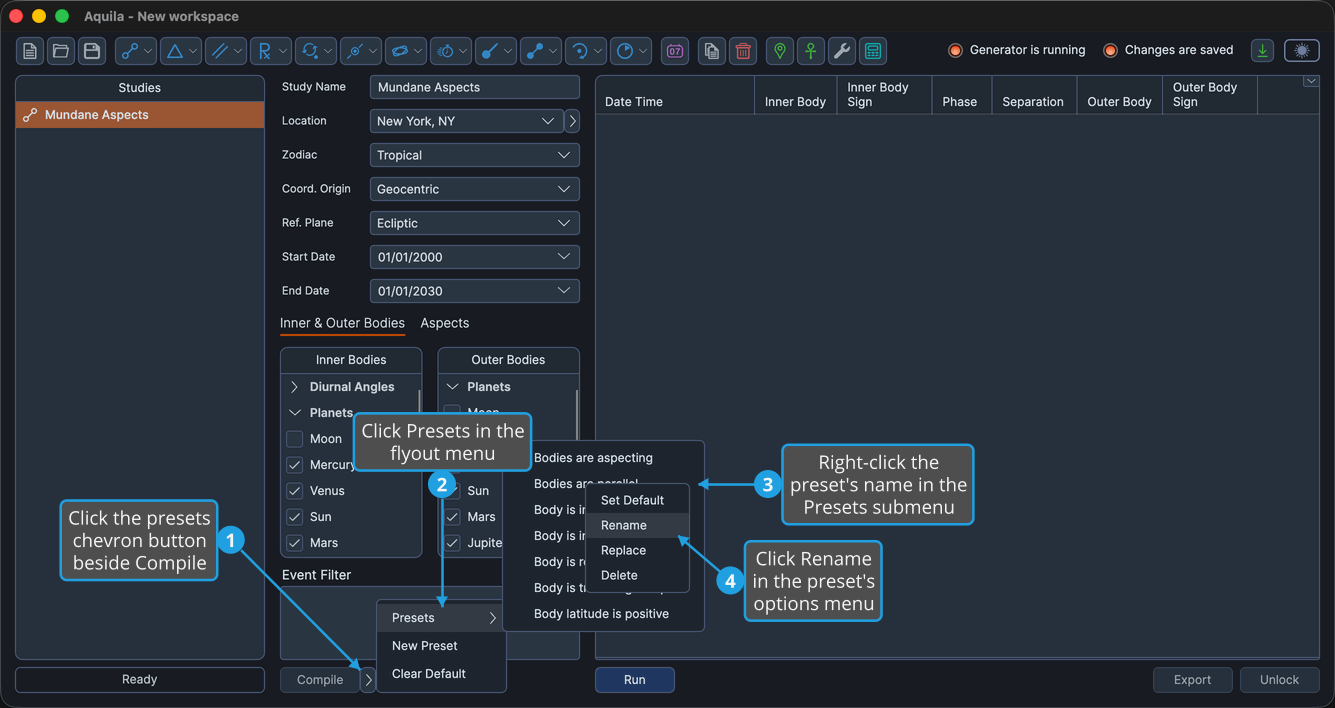
The preset appears under its new name, holding the same expression. See Preset Name Dialog above.
Replace a Filter Script Preset
To overwrite a saved preset with the expression currently in the editor:
- Click the presets chevron button beside Compile.
- Click Presets in the flyout.
- Right-click the preset's name in the Presets submenu.
- Click Replace in the preset's options menu.
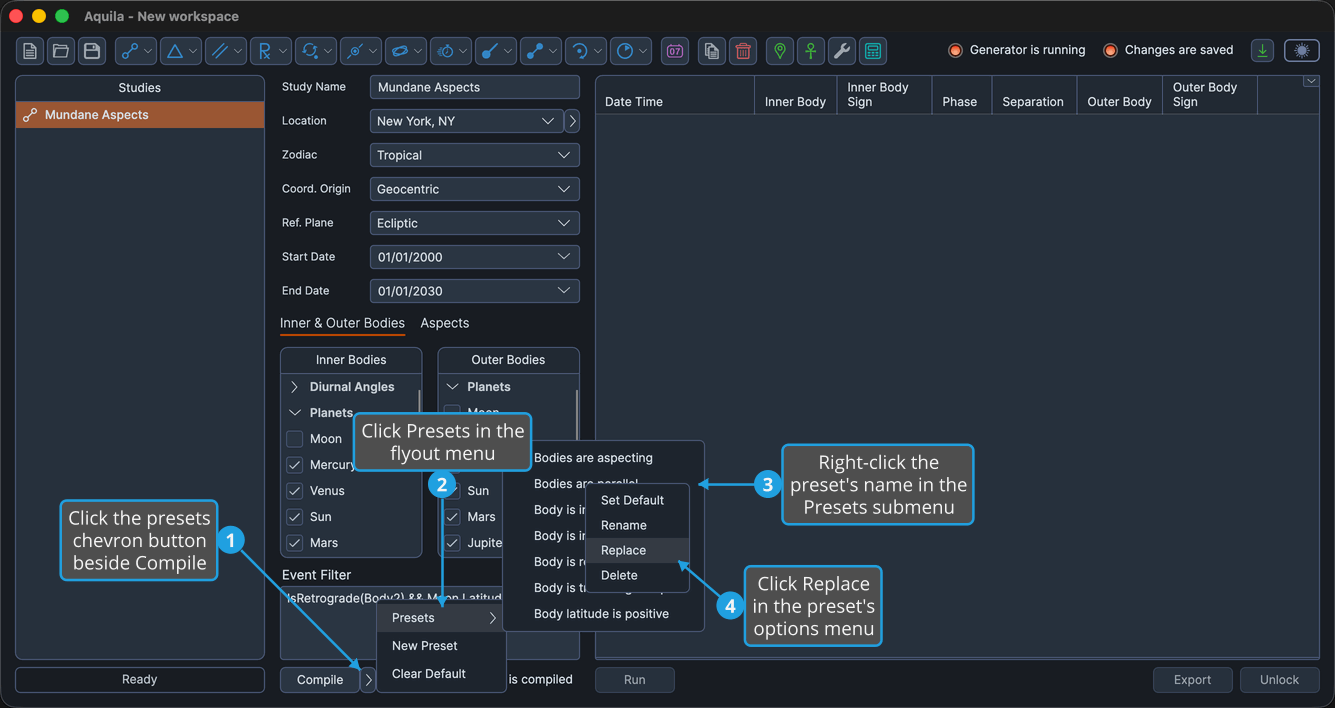
The preset keeps its name and now holds the editor's current expression. The change takes effect with no further prompt.
Delete a Filter Script Preset
To remove a saved preset that is no longer wanted:
- Click the presets chevron button beside Compile.
- Click Presets in the flyout.
- Right-click the preset's name in the Presets submenu.
- Click Delete in the preset's options menu.
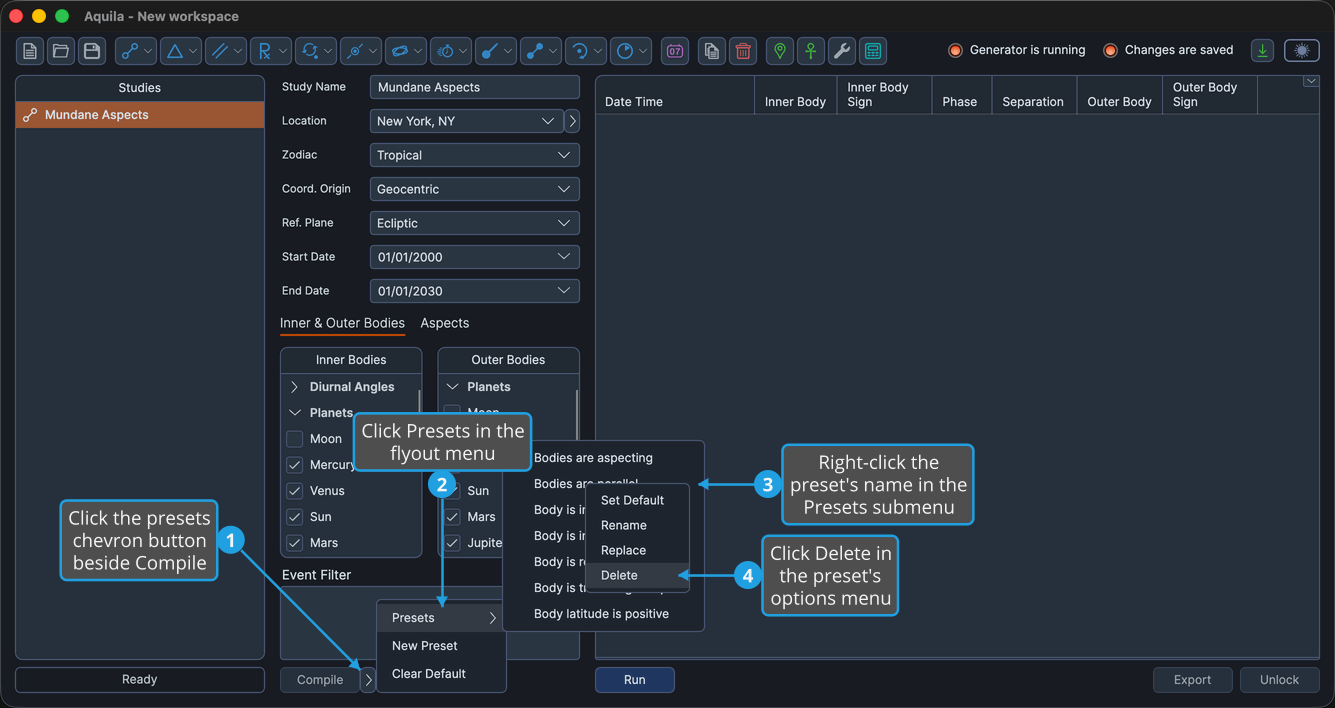
The preset leaves the Presets submenu. The deletion takes effect with no further prompt.
The Presets Flyout
The chevron button opens a three-item menu.
| Item | What It Does |
|---|---|
| Presets | Opens a submenu listing every saved filter script preset. Clicking a name loads that expression into the editor. |
| New Preset | Saves the editor's current expression as a new preset, after prompting for a name. |
| Clear Default | Removes the default marking, so new studies start with an empty editor. |
Right-clicking a name inside the Presets submenu opens that preset's own menu.
| Item | What It Does |
|---|---|
| Set Default | Marks the preset as the one new studies open on. |
| Rename | Prompts for a new name, leaving the saved expression unchanged. |
| Replace | Overwrites the preset's expression with the editor's current one, keeping its name. |
| Delete | Removes the preset. |
On a fresh installation no filter script presets exist; the list fills as you save them.