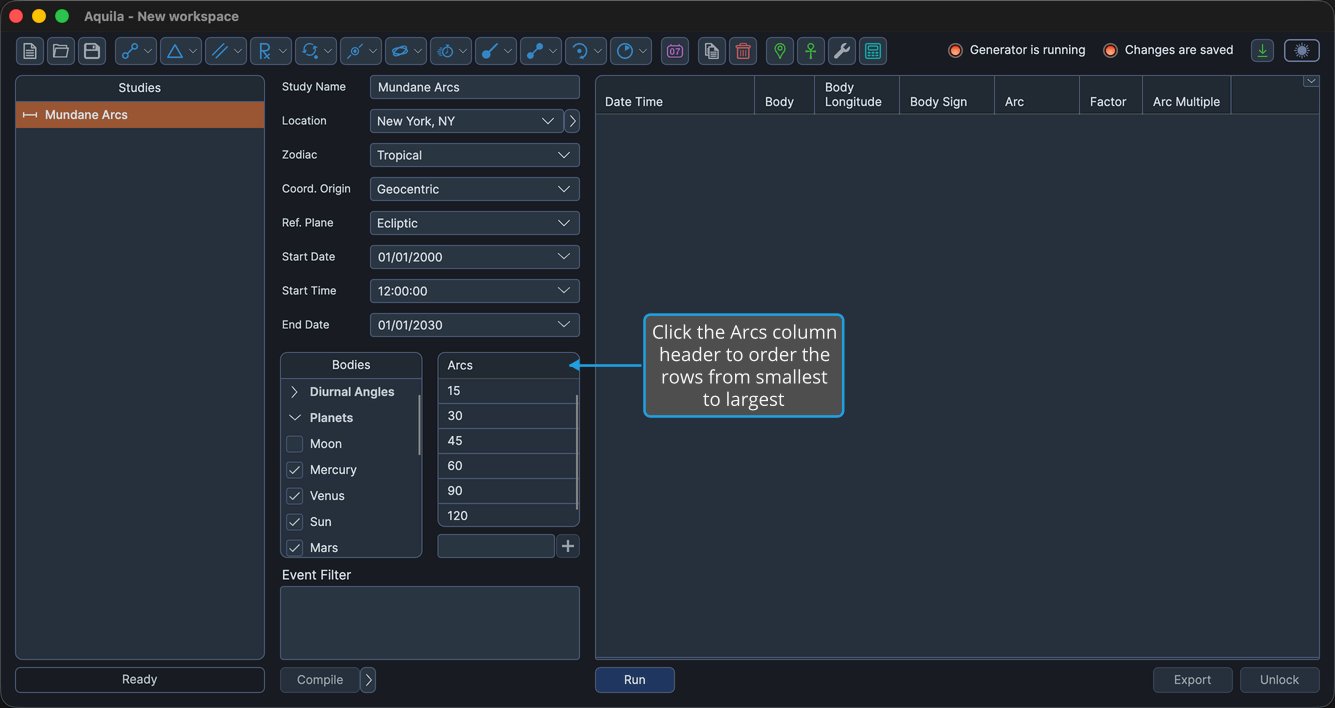
Arcs Table
Arc work is defined entirely by the arcs chosen, so a Mundane Arcs study can find nothing until they are entered. The Arcs table is where they go.
The table holds a list of arcs in degrees of longitude or right ascension, depending on the study's Reference Plane. The study generates an event each time a selected body has traveled a whole-number multiple of one of them. Each value must be greater than zero.
The table is on the Mundane Arcs Study only, under the single column header Arcs, laid out directly in the study's settings column.
These are arc lengths, not orbs. The study fires when the arc a body has traveled matches one of these values, and no orb is associated with the table.
Add an Arc
To add an arc to the study's list:
- Type the arc in degrees into the entry box below the Arcs table.
- Press Enter to add the arc.
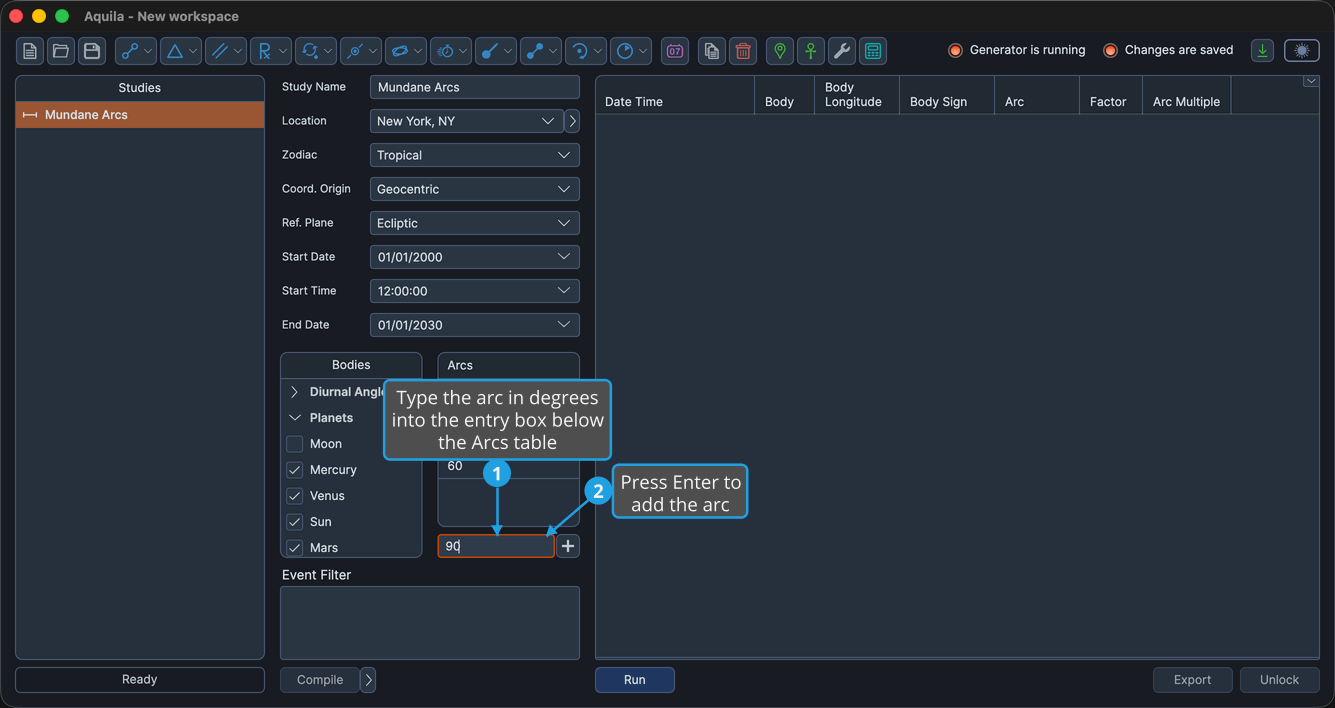
Aquila appends the arc as a new row, clears the entry box, and scrolls the new row into view. The Add button to the right of the entry box does the same thing as pressing Enter; it is enabled only while the entry box holds a value and the study is unlocked.
Edit an Arc
To change the value of an arc already listed:
- Click the arc's row in the Arcs table to select it.
- Click the value cell in the selected row to open the editor.
- Type the new arc value and press Tab or Enter to commit the edit.
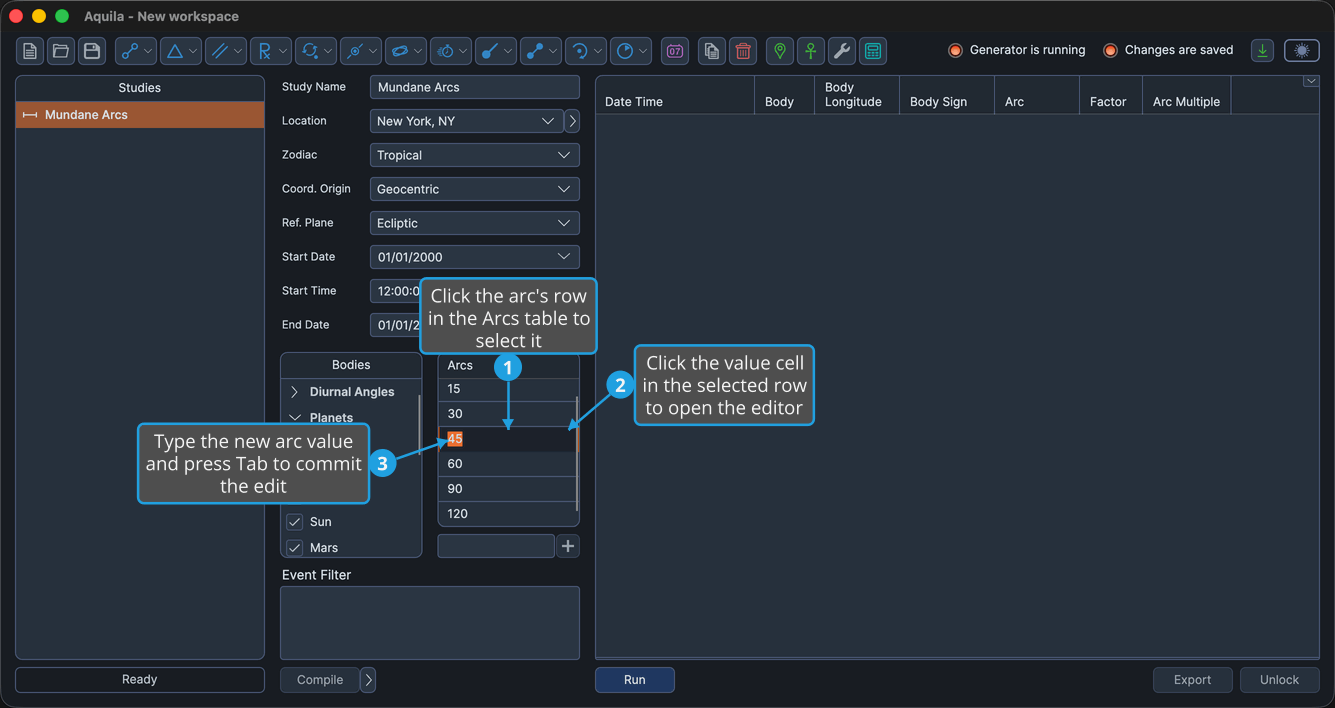
The row shows the new value, and the study searches for it in place of the old one. The editing gesture is shared with the other numeric tables and is documented in full at Edit a Value in a Numeric Table.
Delete Selected Arcs
To remove one or more arcs from the study's list:
- Select the rows to remove in the Arcs table.
- Open the Numeric Table Context Menu and click Delete Selected.
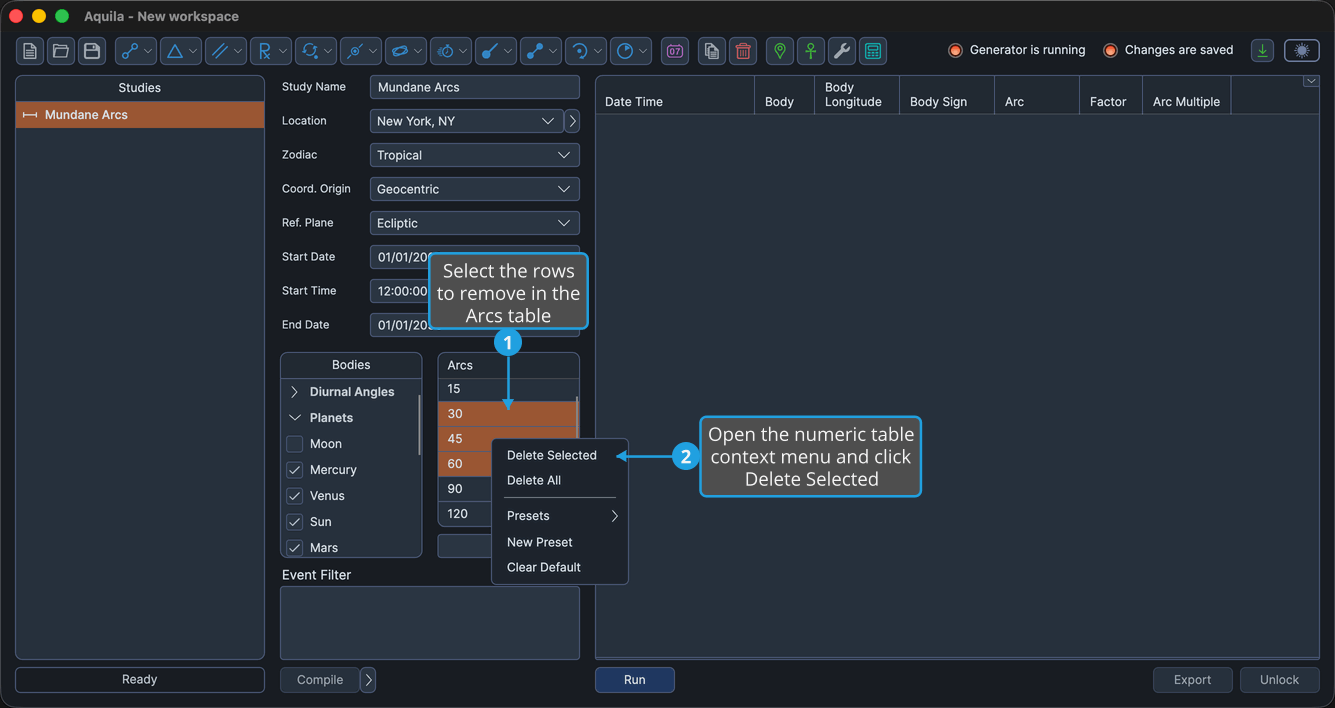
The selected rows disappear and the study no longer searches on those arcs.
Extend the selection with Shift-click or Cmd-click before opening the context menu to delete several arcs at once. Pressing the Delete key with the rows selected runs the same command. On Windows use Ctrl-click in place of Cmd-click.
Delete All Arcs
To empty the study's list of arcs in one gesture:
- Open the Numeric Table Context Menu.
- Click Delete All in the context menu.
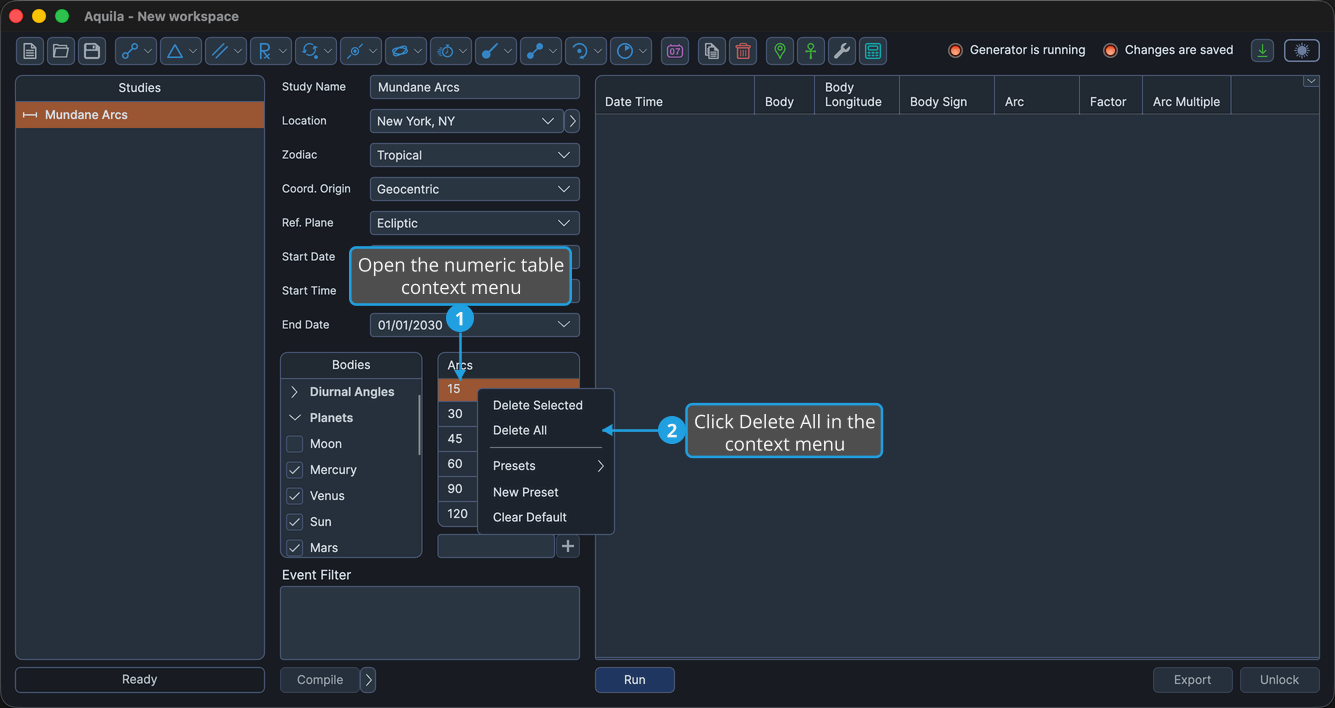
Aquila removes every row, whatever was selected, and the study has no arcs left to search for. The context menu opens only from the body of the table; a right-click on the Arcs column header opens nothing.
Sort the Arcs Table
Arcs are appended in the order they are typed. To put them in ascending numeric order:
- Click the Arcs column header.
Aquila reorders the rows from the smallest arc to the largest. Nothing happens while the study is locked, or while the table holds one row or fewer.