Numeric Table Presets
Re-typing a list of angles or critical degrees for every new study is slow and error-prone. A numeric table preset saves the list a table currently holds under a name, so it can be put back in one click.
Three tables share this one preset mechanism: the Aspects Table, the Hotspot Degrees Table and the Arcs Table. Each keeps its own store of presets, so an aspect preset never appears on a Hotspot Degrees table. Aspect presets go further and are held per aspect-list category, which is what lets a new study of a given technique open on an aspect set appropriate to it.
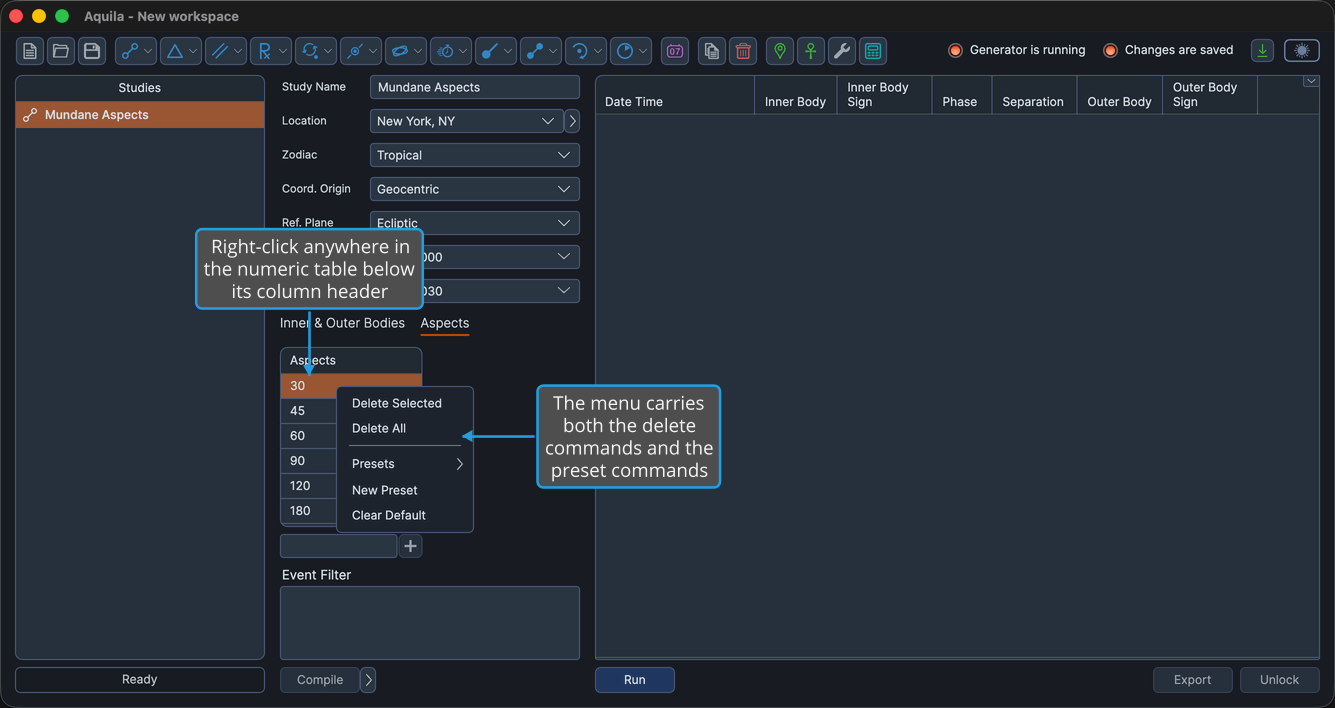
There is no preset button on these tables. The menu opens by right-clicking anywhere in the table below its column header.
Open the Numeric Table Context Menu
The Aspects, Hotspot Degrees and Arcs tables share one context menu, which is where both the delete commands and the preset commands live.
To open it:
- Right-click anywhere in the numeric table below its column header.
The menu opens showing Delete Selected, Delete All, Presets, New Preset and Clear Default. It opens whether or not the table holds any rows, so a preset can be applied to an empty table. Right-clicking the column header opens nothing.
| Item | What It Does |
|---|---|
| Delete Selected | Removes the rows currently selected in the table. |
| Delete All | Removes every row in the table, whatever is selected. |
| Presets | Opens a submenu listing the saved presets for this table. Clicking a name applies that preset. |
| New Preset | Saves the table's current values as a new preset, after prompting for a name. |
| Clear Default | Removes the default marking, so new studies no longer start from a saved value list. |
The menu's items are disabled while the study is locked.
Apply a Numeric Table Preset
To replace the table's values with those held in a saved preset:
- Open the Numeric Table Context Menu.
- Click Presets in the context menu.
- Click the preset's name in the Presets submenu.
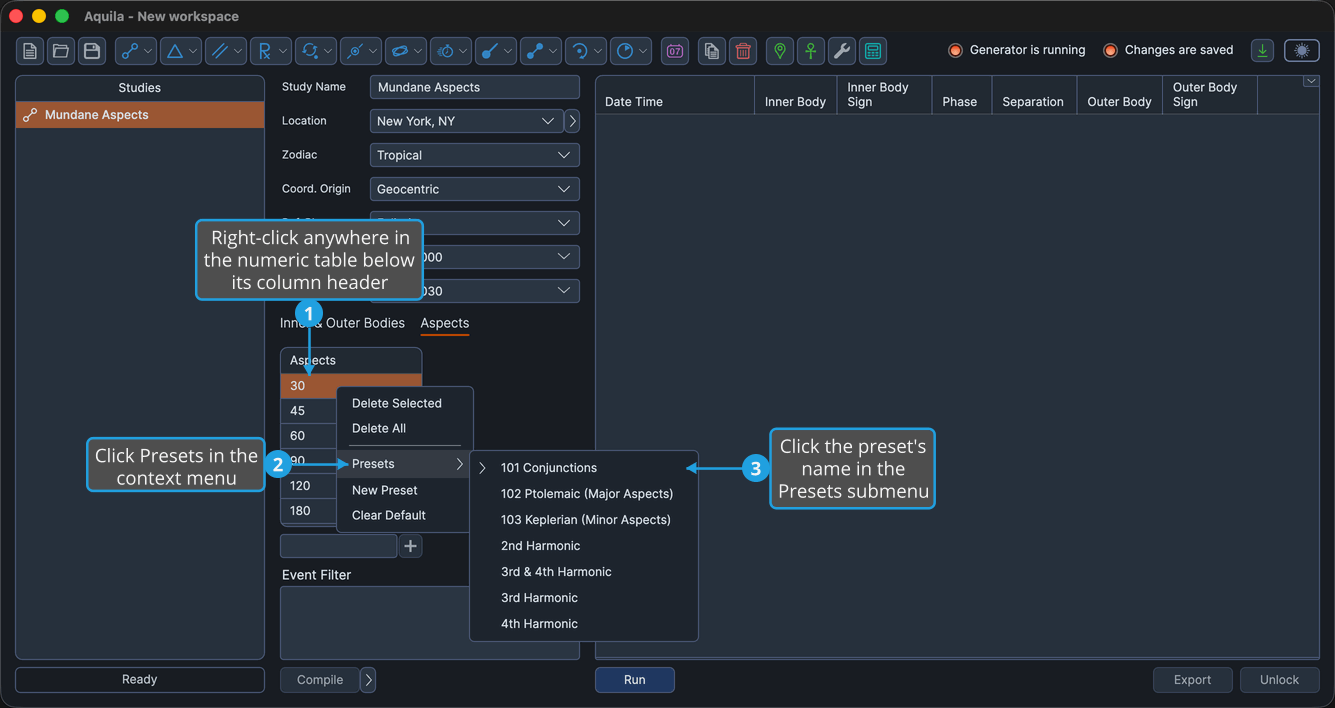
The table holds the preset's values. A preset marked as the default carries a chevron beside its name.
Save a New Numeric Table Preset
To keep the table's current list of values under a name:
- Open the Numeric Table Context Menu.
- Click New Preset in the context menu.
- Type a name in the prompt and click Save.
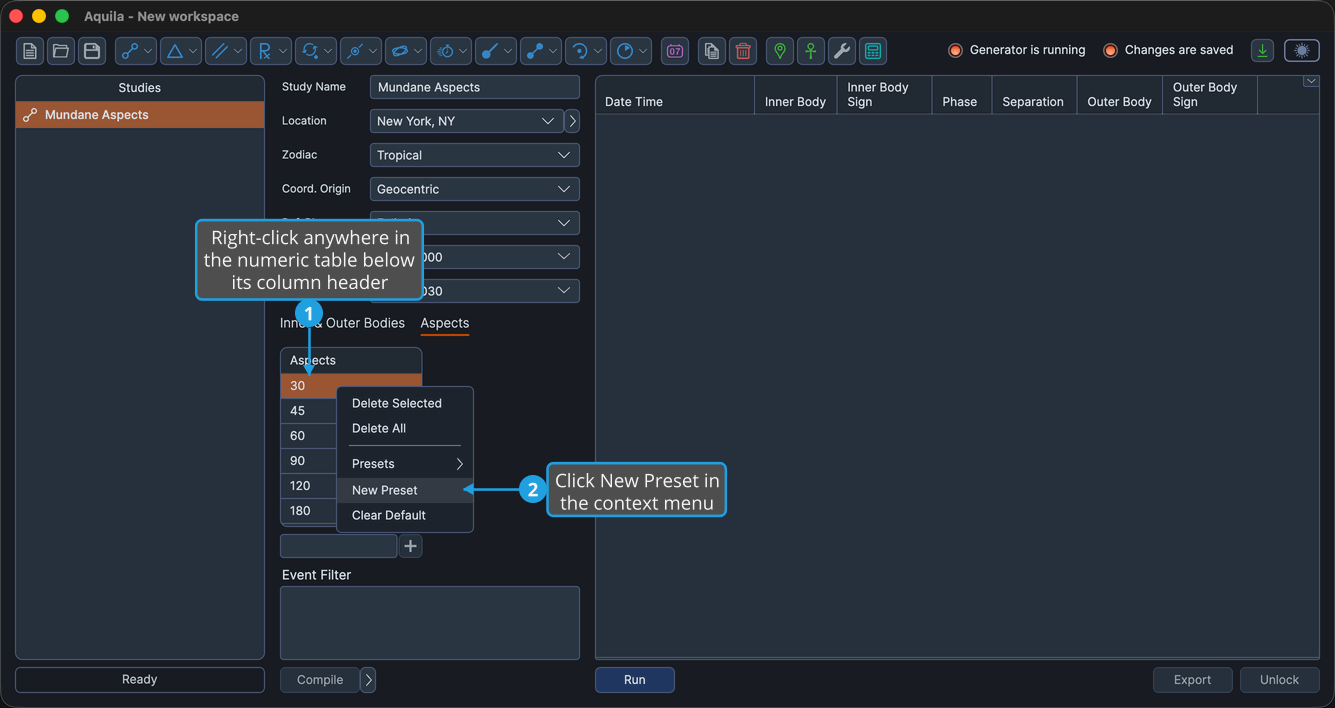
A new preset holding the table's current values appears in the Presets submenu under the name entered.
Preset Name Dialog
The small prompt that collects the name opens with an empty box when a new preset is being saved, and pre-filled with the existing name when one is being renamed. Save is enabled only while the box holds text.
To name the preset:
- Type the preset name.
- Click Save.

Pressing Enter in the name box does the same thing, because Save is the prompt's default button. Click Cancel, or press Escape, to close the prompt without saving anything.
Set a Numeric Table Preset as the Default
A newly created study of that kind opens on the default preset. To mark one:
- Open the Numeric Table Context Menu.
- Click Presets in the context menu.
- Right-click the preset's name in the Presets submenu.
- Click Set Default in the preset's options menu.
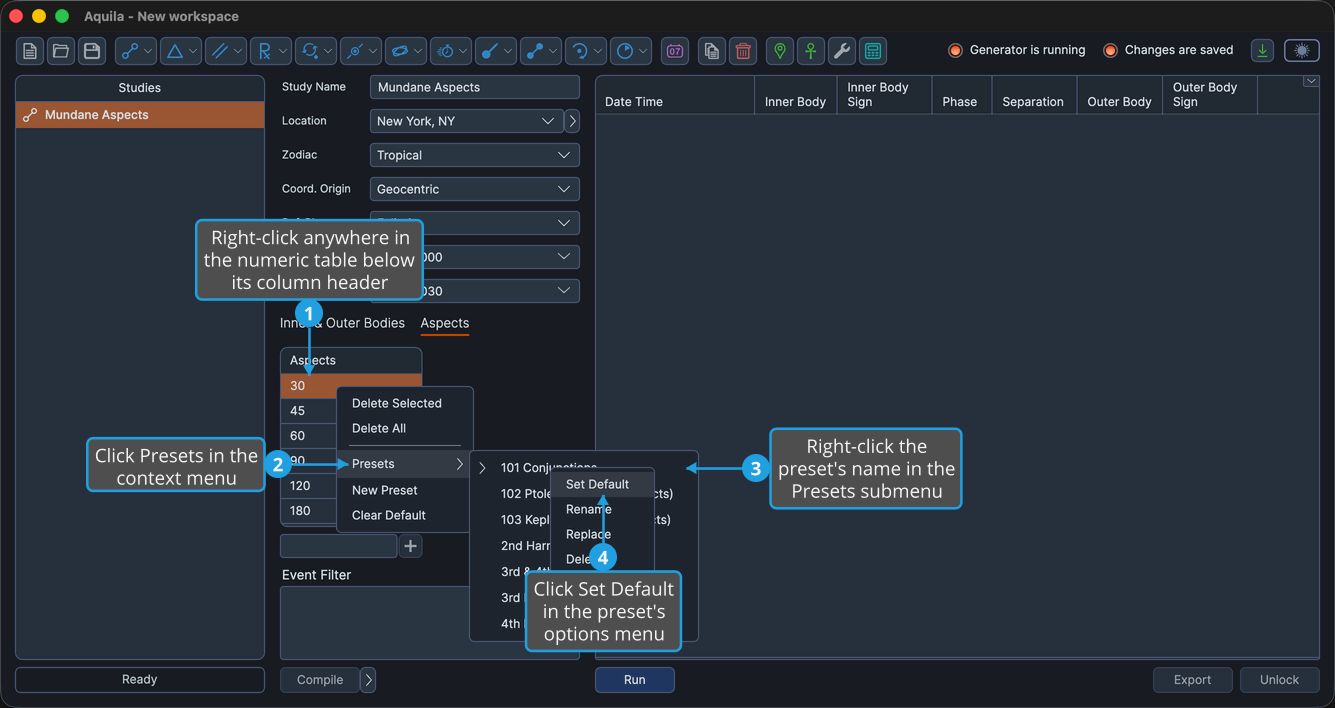
The preset is flagged with a chevron in the Presets submenu.
Clear the Default Numeric Table Preset
To stop new studies starting from a saved value list:
- Open the Numeric Table Context Menu.
- Click Clear Default in the context menu.
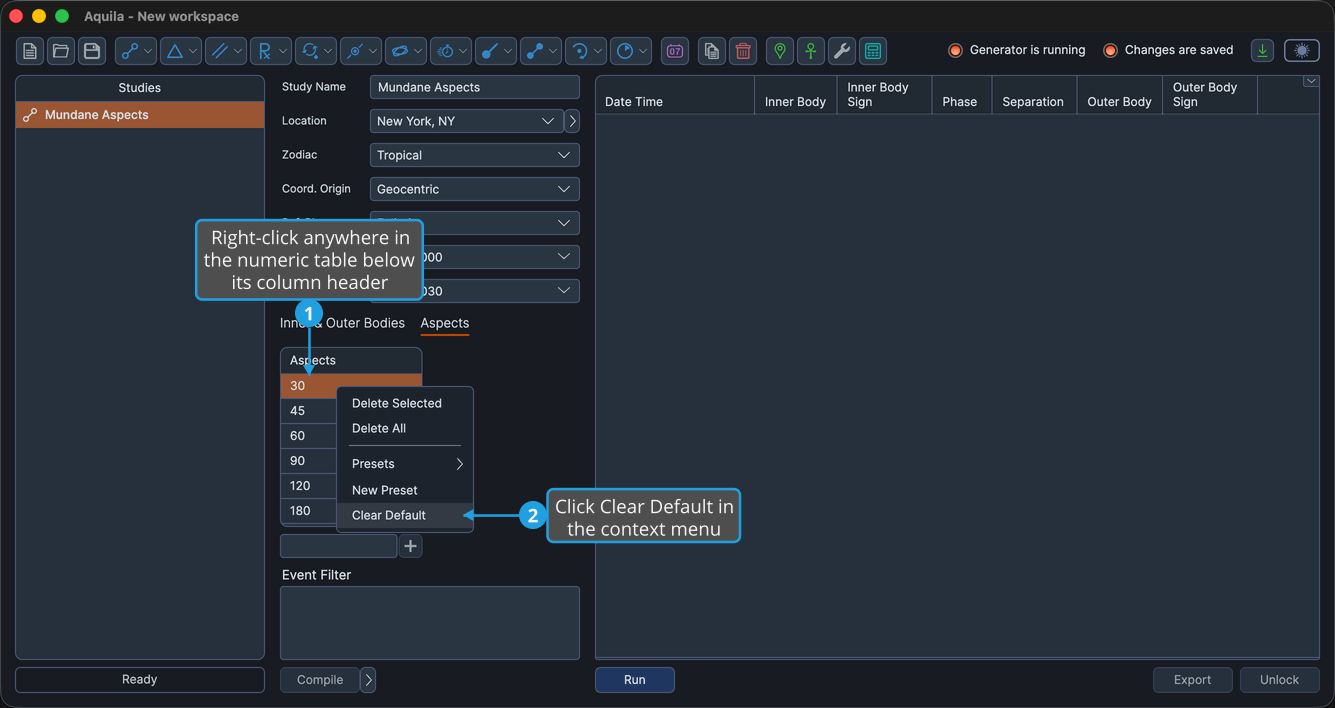
No preset in the submenu carries the default chevron afterward.
Rename a Numeric Table Preset
To give a saved value list a different name:
- Open the Numeric Table Context Menu.
- Click Presets in the context menu.
- Right-click the preset's name in the Presets submenu.
- Click Rename in the preset's options menu.
- Type the new name in the prompt and click Save.
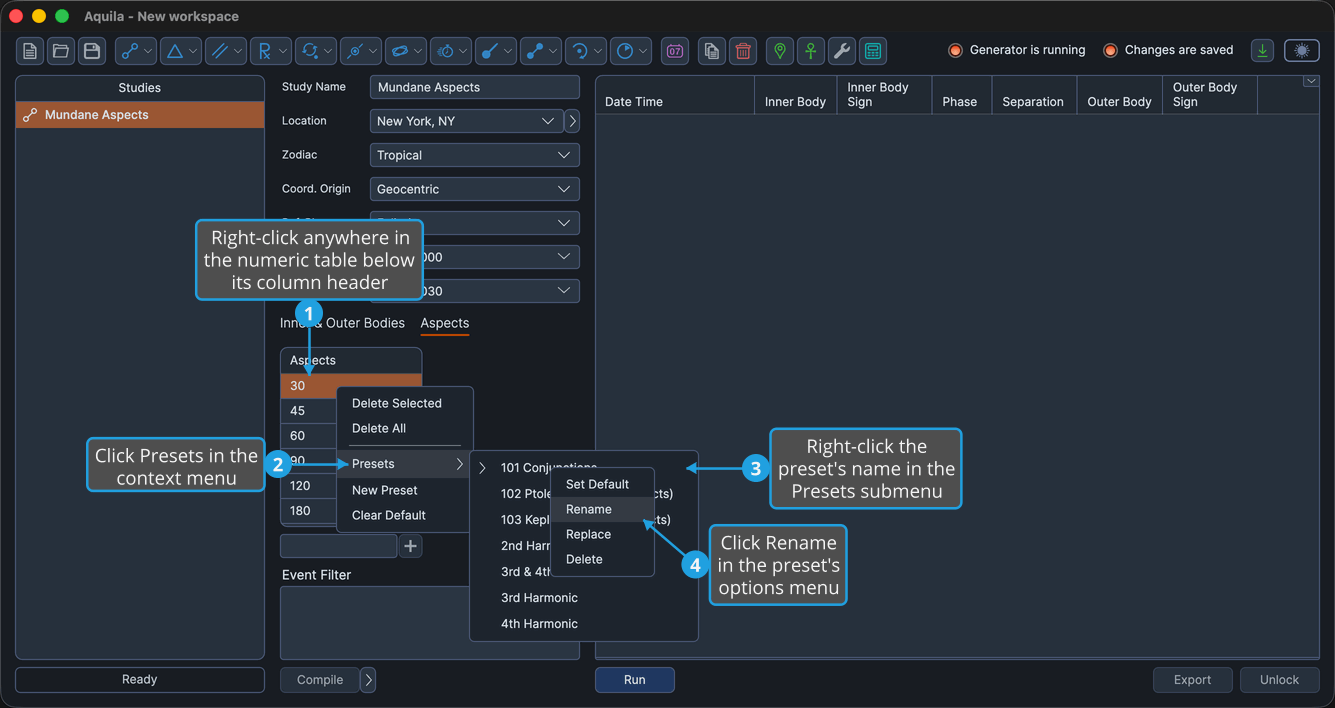
The name prompt opens with the preset's existing name already in the box. See Preset Name Dialog above. The preset's values are unchanged.
Replace a Numeric Table Preset's Values
To overwrite a saved preset with the values the table currently holds:
- Open the Numeric Table Context Menu.
- Click Presets in the context menu.
- Right-click the preset's name in the Presets submenu.
- Click Replace in the preset's options menu.
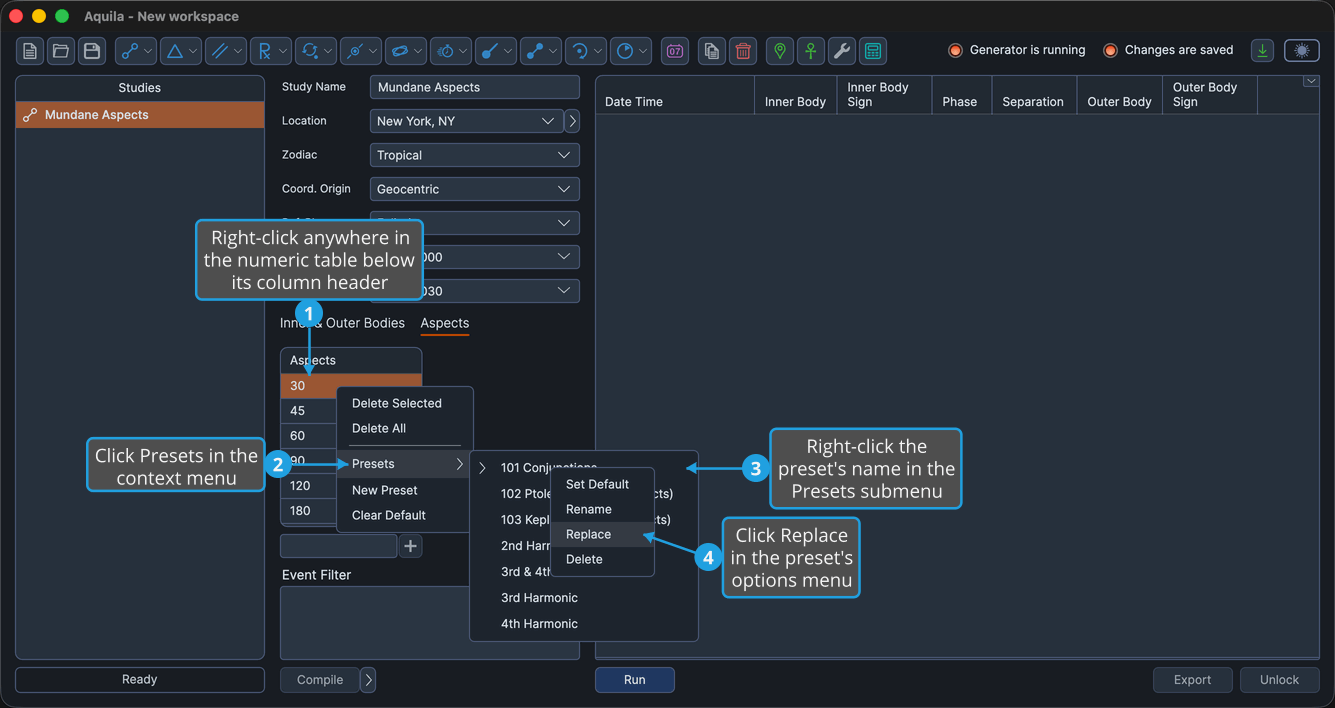
Replace asks for no name. The preset keeps its name and its default marking, and takes on the table's current values.
Delete a Numeric Table Preset
To remove a saved value list that is no longer wanted:
- Open the Numeric Table Context Menu.
- Click Presets in the context menu.
- Right-click the preset's name in the Presets submenu.
- Click Delete in the preset's options menu.
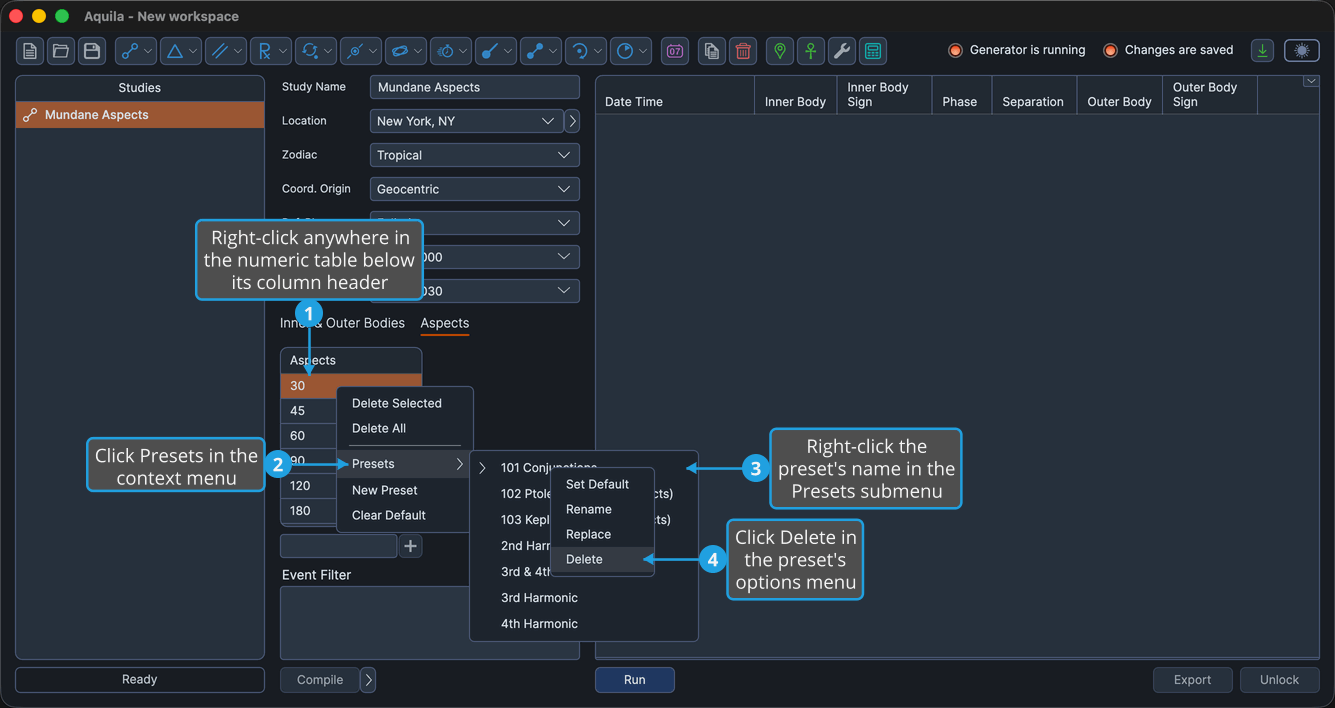
The preset disappears from the Presets submenu.
The Preset Options Menu
Right-clicking a preset's name inside the Presets submenu opens that preset's own menu.
| Item | What It Does |
|---|---|
| Set Default | Marks the preset as the one new studies of that kind open on. |
| Rename | Prompts for a new name, leaving the preset's values unchanged. |
| Replace | Overwrites the preset's values with the table's current ones, keeping its name. |
| Delete | Removes the preset. |